
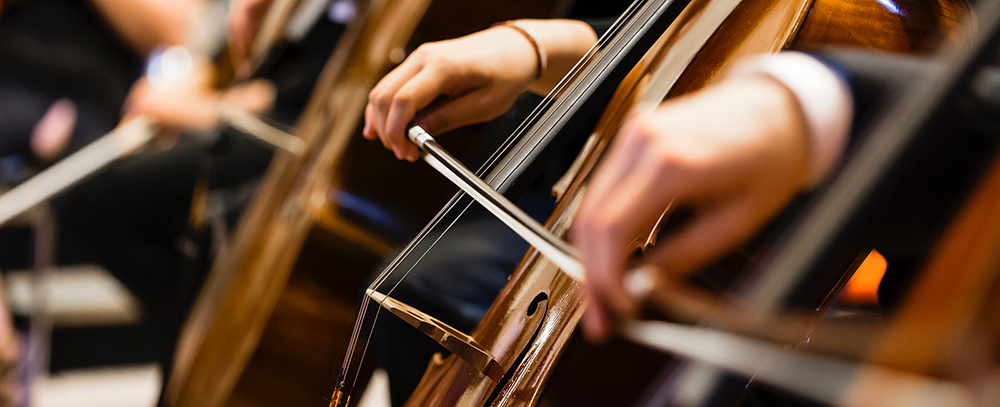
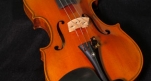
 Orchestral string instruments are exquisitely crafted, and it is important that they are regularly maintained to retain their looks and most importantly, their beautiful sound. Whether you are a beginner or an experienced musician, there are some simple steps that should be taken to ensure your instrument is properly cared for.
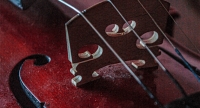
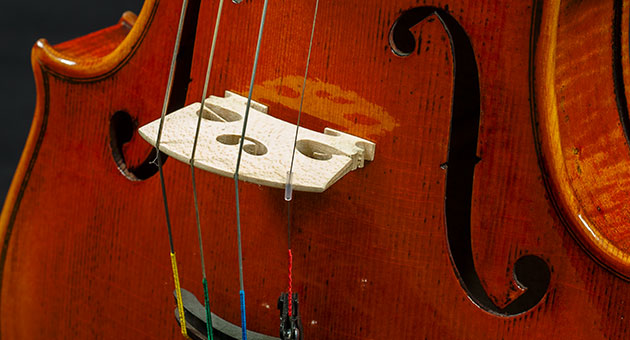
String instruments become far dirtier than you might expect. Firstly, our skin gets oily and sweaty, which is easily transferred to your instrument, and as we use rosin on our bows, the dust from playing will stick to the body of your instrument. That layer of white dust will get everywhere, and you’ll notice it on your strings, bow, and especially between the bridge and the fingerboard.
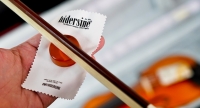
Remove rosin to preserve the finish of your instrument.
After each session, you should always carefully wipe down your instrument. Start with the strings first as rosin can build up easily which could affect your sound. Use a soft microfibre cloth to gently clean the strings. (Do not forget underneath the strings too). If there is a build-up of old rosin on the strings you may wish to consider investing in a special string cleaner to remove this. After you have cleaned the strings wipe the fingerboard, then continue with the face of the instrument around the bridge where the most rosin dust will be found. Take extra care around the bridge & the f-holes as these are delicate parts of the instrument.
Rosin can absorb moisture and become sticky in warm weather causing it to adhere to the varnish of your instrument, so removing rosin dust after use is good practice which will preserve the finish of your instrument. Ideally, use a different cloth to wipe down the rest of the instrument as rosin dust will, and does, get everywhere. Do not forget to clean your bow too. Carefully wipe the entire length of the bow until it is rosin and grease free. And of course, loosen the bow hair before you place it back in the case. Your bow may become warped overtime otherwise.
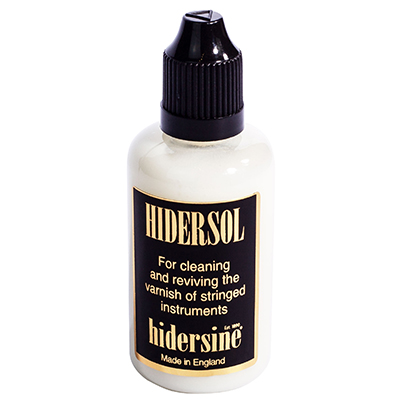
 Use the correct polish for your string instrument.
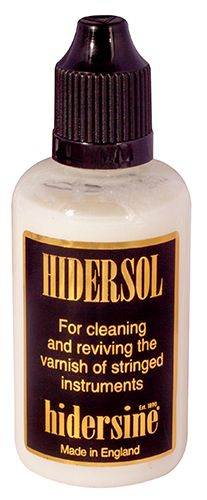
Once a month or so you may wish to polish your instrument, but never, ever use domestic furniture or off-the-shelf wood polish that you may find in a supermarket or hardware store. Hidersine Hidersol Violin Cleaner is an inexpensive staple in violin workshops and is the perfect varnish cleaner for traditional string instruments. Polish should be applied sparingly and only use a dry cloth as string instruments do not react well to water.
Clean your case too! Most people forget that rosin dust, spare strings, broken pencils, and other odds and ends do end up floating around instrument cases. It is also simple to vacuum the interior of your case or simply use sticky tape to pick up excess debris or fluff.
Always store your precious instrument in a good case.
Regarding cases – the best way of looking after your instrument is to always keep it in the case when you are not playing. For violins & violas, once you have finished playing you should take off the shoulder rest then place your instrument into the case, securing it with either ties or Velcro straps around the neck of the instrument. An instrument safely stored away in a case minimises the likelihood of any accidents happening that could damage it.
One of the most important factors in owning a string instrument is where to store it when it is not in use. Wooden instruments are rather sensitive to hot & cold weather conditions, so choose somewhere indoors that is not close to a fire or radiator. Equally, an unheated room or cold conservatory is not a great idea. Consistently high or low temperatures can cause the wood to dry out and shrink, this may even lead to cracks appearing in your instrument.
Keeping humidity levels in check for your instrument.
Equally important is to control humidity & moisture levels. All wooden instruments can and will absorb moisture from the environment. Most orchestral string instruments are constructed using water-soluble glue. If there’s too much moisture (especially if combined with heat) the glue can soften and the seams of the instrument may open affecting the overall structure of the instrument. Whilst you may not notice it straight away, the tone of your instrument could be affected. The swelling (or contraction) can cause your instrument to sound a little different from what you have come to expect.
*In certain environments and dry countries, we would recommend the use of a humidifier to keep your instrument in perfect condition. This should be checked regularly, and ideally carefully monitored with a case mounted hygrometer.
And a final note. Your instrument is most at risk from careless actions and accidents can happen. If it’s not being played, please don’t leave it resting on a chair, leaning up against a wall, or on the floor (cellos & double basses are ok, but leave them in a safe area so the neck & end pin/spikes are out of harm’s way.)
Remember, a good quality case is the best place for an instrument when you are not using it, because if you leave it out unattended, someone else could unintentionally damage it. However, the very best place for an orchestral string instrument is on stage, in a performance with a captive audience. making beautiful music!
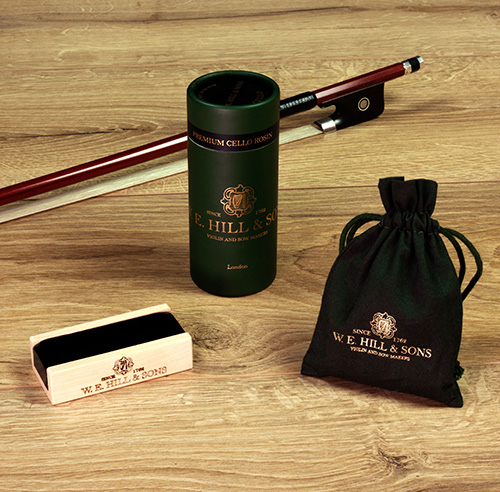
Recommended String Instrument Care Products
 |
 |
 |
 |
| Hidersine Hidersol Instrument Cleaner | Hidersine Hiderpaste | Hidersine Instrument & Bow Cases | W. E. Hill & Sons Conservation Wax |

Having a structure for your violin practice is essential, and using these tips and techniques will help you make the most of your playing time. Try these six tips to improve your playing:
1. Break The Music Down Into Smaller Pieces
3. Increase the Complexity of Bowing Movements
5. Repetition Is Your Best Friend
6. Take Proper Care of Your Violin
 1. Break The Music Down Into Smaller Pieces
Performing music fluently requires practice, so by spending time developing our muscle memory, it improves our familiarity with the music. It also helps our sight-reading abilities.
Breaking the music down into smaller, bite-sized pieces and isolating the moving parts, gives you a better ability to concentrate and work on just one part at a time. It also provides you more insight into which specific components are trickier to play, so you can focus on strengthening that muscle memory.
Going more slowly throughout each section, especially when you begin a new piece, is a technique that ensures you take the time to feel each movement. Solving issues and going through parts one at a time paves the way for enhanced growth and development in your playing.
2. Use a Metronome
Using a metronome in your practice is a really useful way of keeping the timing accurate and ensures your playing doesn’t become uneven.
It helps you concentrate more fully on the playing aspect without worrying about keeping time, since that’s automatically done. It keeps you from veering off-tempo and avoids timing errors, but also helps you learn tricky passages at a slower pace before building up the tempo.
You can purchase a metronome, but you can just as easily download a free app with a metronome to keep the beat for your practice.
3. Increase the Complexity of Bowing Movements
As you build your skills, discipline needs to be at the forefront of your bowing patterns. Adding complexity to your movements puts more demand on your capabilities, and work harder at your training.
An excellent example of varying your bowing patterns is by playing scales. Play the notes of the scale in a dotted rhythm, and change your bow every three notes for variation. Introduce these types of variations when you practice to challenge yourself and see how far you can take your muscle memory and strengthen your skills.
4. Record and Use a Mirror
When you record your practice sessions, you can listen to them afterward and more accurately pinpoint areas of trouble. The recording also lets you know how well you’re able to play fluently and if you’re up to speed on your piece.
Using a mirror provides insight when you’re playing if you’re using the correct posture, holding your bow properly, and how you’re keeping your body. Position yourself so you can monitor your bowing, rotating your body to the left at an angle to assess if your bow angle is correct quickly.
5. Repetition Is Your Best Friend
Once you have identified the sections you need to work on, breaking each part down is the first step to helping you concentrate bit by bit. Then, repetition is a great technique to work on a tricky part of your movement or musical piece.
If you’re able, listen to the piece being played by someone correctly over and over, to get it ingrained in your head so that you can work on mimicking the same patterns, rhythms, and sounds. Repeating the process one part at a time will help ensure you’ve mastered it.
 6. Take Proper Care of Your Violin
It may seem obvious, but one of the most crucial parts of learning to play the violin is ensuring it works well and is in tune for each practice. Keep your instrument in its case when you’re not playing, and remember to loosen your bow before your put it away.
Wipe down the instrument with a cloth each time you practice so that you remove any extra dust or rosin that may have come off of the bow. Don’t leave your violin out of the case or in a cold or hot climate - you want to keep it in a cool, dry, and dark place for safekeeping.
Find out more about how to care for and clean your instrument HERE.
Practice and Stay Consistent
You know the expression “practice makes perfect,” and it couldn’t be more accurate when playing and learning a musical instrument. Practicing a little each day will mean your violin lesson will be more satisfying over all.
If you feel frustrated or overwhelmed with a particular piece of music; taking breaks when you need them is okay. You should give yourself time to process the work and figure out ways to keep yourself engaged with playing the music. Give yourself the time to rest and recover, assess what’s got you feeling that way, and then work to fix it. Playing should be enjoyable, and that includes your practice sessions.
Make playing the violin part of your everyday routine and use these tips and techniques so that you’re sure to adjust your playing and get the most out of every practice session. You’ll see yourself progress and impress yourself with how far you’ve come.
Content courtesy of Nicole McCray & Music To Your Home
We’re guessing you play the violin, viola, cello or upright bass or at least have a keen interest. So, you’ll be familiar with the instruments, the bows, the strings, the pegs and fine tuners and soundposts. But what about the rosin? That hard, amber-like block you use on your bow never seems to get that much attention… which is a shame, because without it, nothing else works. So, let’s redress that balance
Join us as we dive into the world of Rosin.
 What is rosin made from?
The primary ingredient in Rosin is… Resin. Pine tree resin, to be exact. There are particular tree variants and particular locations in which pine trees grow that produce the very finest types of resin that help make the finest rosins, but for the sake of a basic understanding, rosin is, in large part, hardened resin from pine trees. However, there is a little more to it, as resin on its own is really rather hard and unforgiving. So a number of other ingredients are added to create what we all know as ‘Rosin’.
As an aside, rosin is also known as ‘colophony’ in historic circles or ‘kolophonium’ in central Europe and Germany. But technically, this term refers only to the resin part, not the finished ‘rosin’ product, although the words have become interchangeable in some instances.
What are the other ingredients in rosin?
Although the exact details will sadly have to remain locked in our secret recipe book - (which was started by Francis Hider back in 1890) - each rosin needs a certain amount of slip as well as grip depending upon the instrument, the type of string or the musical application.
The tree resins largely take care of the ‘grip’ part of the equation, but additional ingredients such as oils and waxes – sometimes derived from fossil minerals or sometimes from plants and vegetables – add the ‘slip’ and therefore much of the tonal control. Getting this balance just right is where things become really rather tricky, because too much slip or too much grip will result in an unplayable rosin and an unplayable instrument. And that’s of no use to any of us.
How is rosin made?
Hidersine rosin for violin, viola, cello or double bass is made in much the same way as it always has been. Ever since chemist and musician, Francis Hider, created his very first bass rosin blend back in the late 1800s, the goal has always been to create the best tools possible for string players.
In our workshops in Shropshire, mid-west England, we still blend the unique mix of resins, waxes, oils and secret ingredients by hand, then heat, pour, finish and package them all in much the same way as Mr Hider and his colleagues did, over 130 years ago. Although Hidersine are one of the world’s largest manufacturers of rosin, the production technique still requires a lot of human input and historic knowledge.
Why do bows need rosin anyway?
If you have ever picked up a new violin or cello bow, right out of its case or box and tried to play with it, you’ll have noticed that it doesn’t really work. At all.
That beautiful horsehair is to all intents and purposes, smooth. So when it’s drawn across the strings, it glides smoothly… and silently. But that’s not good, as you need a little rough with the smooth to get a useful outcome.
By applying rosin to the bow, you’re coating the hairs in a carefully created, powdery, sticky substance designed to create friction and ‘grip’. So, when the hairs are drawn over the strings, they catch a little (grip) then release (slip), causing the strings to oscillate and resonate through the body of the instrument, creating the sound we all know and love.
 How much rosin should I apply to my bow?
There is no definitive answer to this as it depends on how hard you apply the rosin and for how long etc, and all players and teachers will likely have a particular rule or gut instinct that they would go by. However, perhaps a simpler approach is to understand when you have too little rosin on your bow, or too much rosin on your bow.
Do you have enough rosin on your bow?
If you find the bow slipping around a lot, not making consistent contact with the strings, we’d recommend checking that you have sufficient rosin on your bow, even if it’s just in certain areas. If your bow is not making much of a sound, or if your tone is really thin and perhaps a little whistly, then chances are, you’re probably lacking rosin, at least along certain portions of the bow hair.
But surely, I can’t apply too much rosin, can I?
Although there will doubtless be a point beyond which your bow hair will not take any more, too much rosin is not usually a major issue. You may find your bow feels a little hard to play with – just a bit too difficult to get a smooth note - and you’ll doubtless notice the clouds of dust being launched into the air with every stroke. If you do find that you’ve overdone it, assuming it’s within a reasonable tolerance, you can just keep on playing for a while, wearing the rosin away with use… or you can take your bow to a specialist and ask them to clean the hair. But to be honest, it is unusual to get this level of over-application.
As we’re talking about rosin dust:
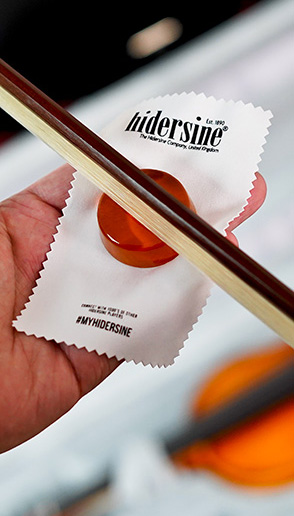
Over a period of time, as you would have already noticed, rosin and rosin dust is transferred from the bow hair onto the strings, the body of your instrument and the bow stick too. It is good practise to wipe your bow, string and instrument with a microfibre cloth after each playing session. That way, you will stop excess build-up. But, if like the rest of us you tend to let things build for a while, at least try not to leave it too long. Rosin can really cake onto a surface and become very hard to remove if left for too long and even cause damage to the instrument’s varnish in extreme cases. You can use products like Mr Hider’s original Hidersol varnish cleaner or W. E. Hill & Sons’ Preparation Cleaner to remove rosin from your cherished instruments or take them to your local specialist and have them do it for you. This is always a good idea when possible.
How to apply rosin to the bow:
Firstly, may we recommend this video made by virtuoso and professional educator, David LePage.
Some people rub the rosin along the length of the bow, and some others draw the bow across the rosin, but whichever way you view it, it’s important to apply rosin to the full length of the bow, not leaving any gaps. Plus, when applying to a new bow, don’t go too heavy, applying too much from the outset. Give the bow a few passes on the rosin, then test the full length of it on the instrument before applying again only if really required.
How long does violin, viola, cello or double bass rosin last?
Some people claim that Rosin has a 'use by' date, but we prefer to see it this way: As explained previously, all rosin requires grip and slip. That slip element is very important as it gives the playability to the otherwise very sticky, grippy resin element. As rosin ages, it gradually dries through evaporation of the naturally occurring liquids, and this is especially noticeable with harder, light rosins commonly used on Violin or Viola. As this natural evaporation occurs you will find that your rosin may begin to crack of its own volition and may also appear more and more dusty. This is just a sign of the rosin gradually drying and is an unavoidable reality.
Although the rosin will still basically function, you will find that your level of control will diminish somewhat. As explained elsewhere, differing levels of ingredient create hard, soft, dark and light rosins and when slightly softer, they offer a little more control. Therefore, when a hard rosin dries and becomes even ‘harder’, the level of string control will decrease.
Beginner players may not notice the difference, but the more accomplished instrumentalist may question why their instrument doesn’t feel ‘quite right’ sometimes… and it may just be something as simple as the rosin having dried a little too much.
What is difference between light and dark rosin?
Light and Dark Rosin differ in 3 main ways:
- Grip Profile – Light rosins generally offer more consistent grip, but allow less subtlety than generally softer, darker rosins.
- Sound Characteristics – Light Rosins generally help produce a sound with more initial attack, whereas darker rosins offer a broader range of tonal variation.
- Appearance – As the name suggests, a Light rosin is usually lighter coloured than a dark rosin. Usually due to the recipe ingredients and cooking method too.

What are the features of a ‘Light’ Rosin?
Light rosins are typically harder mixes of rosin which are referred to as 'light' due to their frequent semi-transparent Amber colour. These ‘light’ rosins generally perform better when used for the thinner strings found on Violin and Viola. They are also well suited to warmer, temperate climates as they have a higher ‘softening’ point so are less liable to lose their structure in extreme heat.
There are some 'light' rosins available for Cello, but these are still a little softer than 'Light' Rosin for Violin or Viola. The light / hard – dark / soft rule is somewhat relative to the instrument to which it is applied.
What are the features of a ‘Dark’ Rosin?
Dark rosins – sometimes called ‘Deluxe’ rosins or ‘Black’ rosins - tend to be a little softer than their ‘lighter’ siblings with the darkness of colour a combination of ingredients and cooking method. Often considered the ‘high-performance’ or ‘professional’ choice, dark rosin often lends a little more control to the player, opening more dynamic possibilities whether used on Violin, Viola or Cello.
Should I choose a different rosin depending on my local climate?
If you live in a temperate part of the world – such as Northern Europe - you have the luxury of choosing any rosin you fancy without having to worry too much about climatic issues. If however, your home town experiences more extreme heat or cold, you may want to choose a little more carefully.
Light Rosins tend to be harder than dark rosins overall. That hardness translates into a higher softening temperature. Therefore, in areas of extreme heat, a harder rosin would be a wiser choice for you. If however, your locality is often very cold, you may find that an already hard, light rosin is more difficult to apply by its nature, and a dark, softer rosin will perform better for you overall.
It is worth noting however, most players have no problem with their rosin choice and their climate, and even in areas of extreme temperature – whether hot or cold – rosin maintenance is quite manageable because instruments are kept in controlled environments for their own safety, and of course the rosin is generally in the case too. So, protecting your instrument also protects the integrity of your rosin.
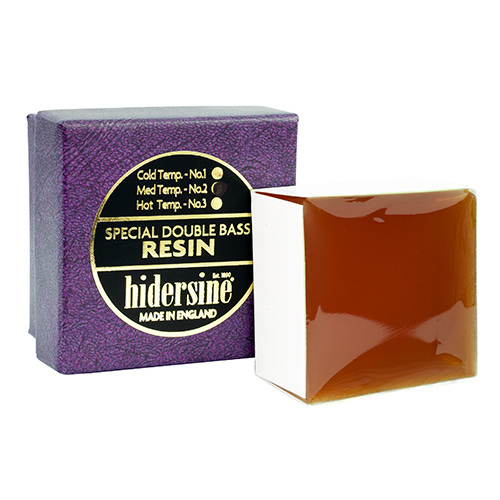
With a great many homes, schools, rehearsal rooms and performance venues equipped with climate and sometimes humidity control, the light / dark rosin consideration can be more often a tonal choice than a climatic necessity. The exceptions tend to be Double Bass rosins, certainly the DB or 4B bass rosin types. These rosins use much higher levels of waxes, oils and other ingredients that create a much softer blend favoured by many bass players. This is why Hidersine make 3 distinct variants of DB and 4B bass rosin: Cold Climate, Temperate and Warm Climate.
 Want to know more?
Read about 'How To Choose The Best Rosin for your Violin, Viola, Cello or Double Bass'
View the full range of Hidersine Rosin and W. E. Hill Products
4 big questions to ask when choosing the right Rosin for your violin, viola, cello or bass.
- Do you consider yourself a beginner, an intermediate, a professional or a virtuoso?
- What type of sound do you really want? Strident with greater attack or a more subtle, mellow tone?
- Do you want ease of playing, or more advanced control?
- Is your climate generally very hot or very cold?
Firstly, it’s worth stating that anyone can use any level or variant of rosin to decent effect. Much like any level of musician can play an original Stradivari violin. The difference is whether you can get the best out of it.
Of course, an absolute beginner can make the finest instrument sound scratchy, and a seasoned pro can make the cheapest fiddle sound beautiful. But this is where the law of diminishing returns rears its head. As an example, travelling first class on an airplane may offer you 3 x the seat width and legroom than travelling in economy, but it costs far more than three times the price. Likewise, improving your sound by 10% is much more than 10% more difficult.
Likening this to rosin – as this is where we’re going here – anyone can use any rosin and make a sound on their instrument. However, a more skilled player will be able to take advantage of the enhanced musical control offered by the deluxe and premium rosins. Another way of thinking of it, is in terms of unlocking potential dynamic levels. A harder, light rosin is great for maintaining a consistent sound, but allows fewer dynamic ‘levels’ to be reached when compared to the slightly softer, deluxe and premium rosins. These rosins unlock a greater number of dynamic levels from the outset, and therefore more care is required to maintain a truly consistent sound.

Which rosin is best for a beginner violinist or cellist?
The key for beginners is usually ease-of-playing. Therefore, you would require as predictable a level of grip as possible from the outset. Your time will be spent learning the basic techniques relating to your instrument and your bow, and for that you need consistency with as few variations as possible.
The top 3 rosins recommended for beginner Violin and Cello players are:
Hidersine 3VM (violin) or 3CM (cello) – a medium size light rosin with excellent grip consistency.
Hidersine 1VM (violin) or 1CM (cello) – a large size, light rosin with excellent grip consistency.
Hidersine 12VM (violin) or 12CM (cello) – a smaller, junior sized rosin with great consistency.
It’s worth noting that Hidersine light rosins, such as those above, are suitable for just about any application. They will perform just as well for a beginner as for a seasoned professional. As you progress along your musical pathway however, you will find that other rosins offer you a little more variation and control.
Which rosins are suitable for intermediate stringed instrument players?
You’ll know well, that as you become more and more proficient with your instrument, your need and desire for nuance and subtlety increases, plus the music that you’re playing will require a broader and more varied palette of sound types.
Imagine sitting on the front desk scanning the music, noticing staccato passages swiftly followed by sustained periods of a much softer style. You’ll need the confidence and ability to ‘dig in’ sufficiently for the staccato passages yet retain the control necessary to quickly switch to playing a pianissimo legato section.
Using a slightly softer rosin, such as the Deluxe or Hidersine Reserve21 Rosins, this type of transition can be much more easily achievable and accurate. However, you as the player need to exert a little more control in the process.
The Top 3 Rosins recommended for Intermediate String Players – Violin / Cello
Hidersine Reserve21 HR21VL (violin) or HR21CD (cello) – A large cake of premium rosin using British Beeswax for the very smoothest playing experience.
Hidersine 6VM (violin) or 6CM (cello) – a medium sized deluxe, dark rosin with a slightly softer consistency.
AB Rosin 2062 (violin or cello) – a medium sized dark rosin with a well-respected recipe devised by educator Amy Birch in the early 20th century
 Which rosins are best for professional players?
Finding just the right violin or cello rosin for you and your instrument is a personal journey of course, but as a very proficient player or teacher, you seek to get the very best from your instrument and bow on every occasion. The need to communicate the composer’s deepest intention is of utmost importance.
You already have your beautiful instrument strung with just the right combination of strings, paired with a wonderfully balanced bow. All that remains to find is the last ingredient. The creative substance that imparts grip and feel to the bow, and in turn, causes the strings to resonate through historic tonewoods. Using a rosin that grants as much freedom as possible is key to true musical expression. The appropriate softer rosin blends – which are often, although not always, darker in colour too – are the obvious choice.
The Top 3 Rosins for Advanced or Professional Violin players
Hidersine Reserve21 (Violin) - A large cake of medium-softness, premium rosin enriched with British Beeswax for the very smoothest playing experience. Extremely expressive.
W. E. Hill & Sons’ Premium Rosin (Violin) – Presented in a Maplewood holder, Hill Premium is a unique, medium rosin that allows remarkable note articulation.
Hidersine 6VM (Violin) – A large cake of slightly soft, dark rosin for good levels of control.
The Top 3 Rosins for Advanced or Professional Cellists
Hidersine Reserve21 (Cello) - A large cake of medium-softness, premium rosin enriched with British Beeswax for the very smoothest playing experience. Slightly softer than the violin version, designed specifically for expressive playing on the thicker strings of a cello.
W. E. Hill & Sons’ Premium Rosin (Cello) – Presented in a Maplewood holder, Hill Premium Cello Rosin is a unique recipe, medium rosin developed specifically for the thicker strings of a cello.
Hidersine 6CM (Cello) - A large cake of slightly soft, dark rosin for good levels of control across the board. Again, a little softer than the violin variant, designed for thicker strings.
Is there specific rosin for Viola?
Although it has been quite common historically for Viola players to use Violin Rosin, there are now a couple of specially created options. As the strings on a bowed instrument get thicker, the necessary rosin tends to become a tiny bit softer: as you may remember, a ‘hard’ cello rosin is actually softer than a ‘hard’ violin rosin. Happily, both Hidersine and W. E. Hill & Sons have an offering now specifically for Violists, with a recipe that carefully bridges the gap between violin and cello, designed to get the very best from a Viola’s slightly thicker overall string diameter.
The Top 3 Rosins for Viola Players
W. E. Hill & Sons’ Premium Rosin (Viola) – Presented in a Maplewood holder, Hill Premium for Viola is a newly-created, medium rosin formulation designed to enhance the natural warmth of the instrument’s tone.
Hidersine Reserve21 (Violin) – Although designed for Violin initially, Hidersine Reserve21 rosin is unique in its use of Beeswax. The resulting smoothness suits Viola very well, helping deliver a deep and mellow tone.
Hidersine 1VAM (Viola) – Based on the world-famous Hidersine 1V for violin, Hidersine has taken tried and tested recipe and tweaked it just enough to bring out the very best from the Viola’s string profile.
What’s the best Double Bass Rosin?
As discussed elsewhere in our rosin information, the general rule is, the thicker the string, the softer the rosin needs to be. Of course, within that, there are parameters that can be adjusted that bring about a different sound and playing experience too.
So, Double Bass or Upright Bass rosins are frequently much softer than violin or viola rosins, and somewhat softer than cello rosins too. In fact, when choosing some rosins such as Hidersine’s DB1 and DB2, players need to be aware of their comparatively low softening temperature. That is why 3 different variants are offered in the DB range of rosins: Cold Weather, Temperate, and warm weather.
As these Double Bass rosins use a much higher concentration of waxes and oils than rosins for smaller instruments, their softening temperature is much lower. As there is also an optimum consistency for rosins to perform at their best on bass, the mixture is varied depending upon the likely environment in which the rosin will be used.
 Which Double Bass Rosin should I choose?
DB1 ‘Cold Climate’ bass rosin is the softest of the three, as a consistently colder ambient temperature will keep the rosin somewhat harder overall, so the mix needs to be a little softer to keep the rosin at the necessary playable consistency.
DB3 ‘Warm Climate’ bass rosin is the hardest of the three options as a continually warm temperature will make the rosin naturally softer. Therefore, a slightly harder mixture in a warmer environment will result in the ideal rosin consistency.
DB2 ‘Temperate’ bass rosin is positioned in-between the two extremes and is the choice suitable for most non-extreme localities.
Are there any harder Double Bass Rosins, and do they perform as well as softer versions?
Yes, there are some slightly harder rosins designed for upright bass. Sometimes the need for consistency trumps the desire for all out expressionistic possibility, and that’s generally where harder rosins perform best. In the world of bass rosins, this still applies, although W. E. Hill & Sons Premium Bass Rosin is somewhat of an anomaly in this regard. Thanks to its truly unique recipe, the Hill Premium Rosin manages to be a little harder than many others yet still deliver wonderful bow control.
Which of the two harder Double Bass Rosins should you choose?
W. E. Hill & Sons Premium Double Bass Rosin
Presented in a Maplewood holder, Hill Premium Bass Rosin is a newly created, medium-soft rosin formulation. With a unique recipe as well as visually darker ingredients, Hill Premium is made a little harder than some other Bass Rosins but has been designed with musical expression at the forefront. W. E. Hill & Sons rosins have always used a different set of ingredients to Hidersine (and all others too) and have set themselves apart in this regard with a set of arguably the world’s foremost premium rosins.
Hidersine 6B Deluxe Double Bass Rosin
Based upon the historic recipes of Francis Hider – a professional bass player himself – 6B is already a firm favourite amongst bass players. Positioned as a medium hardness rosin, based upon the core Hidersine 6V / 6C Violin or Cello recipes, 6B takes a winning formula, makes it a little softer and more malleable and delights bass players of all standards with a reliably strident tone.
 Want to Know More?
Read about 'Everything you ever wanted to know about Rosin (for musical instruments!)'
View the full range of Hidersine Rosin and W. E. Hill Products
More...
 You’ve got your new bowed instrument and are progressing through your lessons nicely, enjoying mastering new techniques as you go. Musical life is good!
However, your violin, viola, cello or double bass has suddenly started to sound unpleasant, has become difficult to play or is no longer staying in tune.
We’ve covered how to clean and care for your instrument HERE and shared top tips for caring for your bow HERE, so this time, let’s focus on your instrument’s fittings.
Your bowed instrument features many parts and fittings that all play a vital role in how it performs. Making sure your pegs, strings, bridge, chinrest and other essential parts are fitted and performing correctly will ensure your instrument remains comfortable, easy and fun to play.
Here’s some tips to consider as part of your maintenance routine…
Are Your Pegs Sticking or Slipping?
 Pegs secure and hold your strings under tension in the ‘head’ (or ‘pegbox’) at the top of the neck. They play a key role in the correct vibration of your strings and are turned to tune your bowed instrument.
Most bowed instrument pegs simply slot firmly into their accommodating holes, where they shouldn’t move. However, over time they can lose their natural grip and can start to slip. Conversely, if fitted too tightly, they will stick and be difficult to move. Both make your instrument difficult to tune and may be the reason it keeps dropping out of tune - which will soon see you wasting valuable time in your music lesson… more about how to avoid this HERE.
Peg paste is a great little accessory that you should always have handy in your instrument case. If your pegs are sticking or slipping, simply apply a small amount to the peg and re-fit. It’ll help resolve any issues and ensure your pegs continue to operate correctly. Always support the neck of your instrument when fitting and adjusting pegs.
This is all well and good, but what if we told you there's a way to no longer have to worry about applying peg paste and how your pegs are performing? Hidersine FineTune and Academy instruments feature Wittner FineTune pegs. These clever geared pegs are a genuine revelation, with seasoned professionals choosing to fit them to the very finest instruments. They have a traditional appearance but feature a discreet, internally geared mechanism that means tuning is quicker, more stable, and so much simpler for students too!
That means less time tuning and more time playing!
Changing & Fitting New Strings
 So, your pegs are in good condition and you’ve used peg paste when required, but your instrument is still slipping out of tune. This might sound obvious, but did you wind your strings on your violin, viola, cello or double bass properly when you last changed them?
You might feel a little apprehensive to change your strings for the first time, but don’t worry, it’ll become second nature once you’ve done it a few times. Ensuring you know the best practice from the get-go can only be a good thing though so, focusing on the violin, let’s cover how to do this correctly.
- STEP 1: Change One String at a Time. Keeping the other three strings fitted and under tension, change one string at a time. Removing all strings at the same time can cause your violin sound post to drop (more on this below) and will mean you’ll need to reposition your bridge correctly as you go.
- STEP 2: Thread the String into the Peg. Locate the hole that runs through the centre of the peg and thread your string through. Top tip… Make sure you don’t confuse your pegs and end up installing your D string into the G peg, for example. (Another reason to change one string at a time). Once the string is threaded, check your peg alignment. You may need to push the peg into the pegbox or move it out a little to ensure it lines up correctly relative to the other three strings and that no strings cross over each other.
- STEP 3: Wind the String. Begin winding the peg slowly onto the peg, ensuring you wind the left pegs (G and D on violin) anti-clockwise and your right pegs (A and E) clockwise. Wind the initial loop towards the narrower point of the peg, then cross the string over the first loop and continue to wind the remainder of the string towards the opposite, wider end of the peg. This will create a good anchor for the string, locking it into the peg which will help to stop it from slipping. Continue winding towards the wider end of the peg, creating a tidy row of string coils that sit next to one another rather than crossing over each other. Wind until the string coils are close to the edge of the pegbox but not touching it.
- STEP 4: Attach to the Tailpiece. Now that your string is anchored in the peg at the pegbox, you’ll need to run it down the fingerboard, over the bridge and attach it to the tailpiece. Run the string between your index finger and thumb to make sure it is not twisted before attaching the ball or loop end into the tailpiece.
- STEP 5: Tighten & Remove Slack. Now your strings are anchored at both the peg and tailpiece, you can turn the peg to remove the slack and tighten the string. Check that your string isn’t caught or looped around any other parts or fittings and ensure it is seated in the correct slots at both the nut and bridge as your carefully tighten. Most violin E strings feature a bridge protector – a small piece of plastic tubing that slides along the string. Make sure to position this in the bridge slot before fully tightening. It is designed to stop the E string buzzing. Don’t worry about tuning the string at this point – you’ll want to do this once all new strings are fitted. Just make sure it has sufficient tension to hold its correct position at this stage.
- STEP 6: Check Your Bridge. Once you’ve fitted all fours strings and they’re under tension but not fully tightened and tuned, check your bridge is positioned correctly. You can learn how to do this in detail below.
- STEP 7: Tune Your New Strings. Start by loosening your fine tuners in the tailpiece. Generally, our Hidersine student and beginner violins feature four tailpiece tuners and our instruments designed for more advanced levels and players feature a solitary fine tuner on the E string. Using a pitch pipe, tuning fork, or electronic tuner, pluck the string to check its pitch. Tighten the string using the peg until it reaches the desired pitch. Make sure you don’t over tighten the string beyond its correct pitch. Once all four strings are tightened and at the correct pitch, you’re good to go. You may find that your newly fitted strings go out of tune a little at first. This is normal and a result of them naturally stretching. You can use your fine tuners at your tailpiece to make small incremental tuning adjustments where required. Turn your pegs to make larger tuning adjustments.
Not sure what all the parts we’ve just referred to are? Don’t worry, here’s our handy guide to the different parts of the violin. Take a look HERE.
Adjusting Your Bridge
 Getting into the habit of regularly checking your bridge is fitted and aligned correctly is a sure-fire way to keep your instrument sounding and feeling great to play. Your bridge can easily move and will tip forward if your strings are wound too tightly. Always make sure its feet are flat against your instrument’s table and that it is positioned in the correct place on the table.
Your bridge should be straight and parallel with the notches in the centre of both f-holes either side of it. These f-hole notches are not just for decoration, they’re a useful guide to help you position your bridge in the correct place on your instrument table.
Always take care when adjusting your bridge that your strings aren’t too tight. Trying to move your bridge when under too much string tension can damage your bridge, mark the table of your instrument, or even worse – cause the table to split. It’s a good idea to loosen your strings slightly before making your bridge adjustments.
When to Replace Your Bridge
There will come a time when you need to replace your bridge. So, what are the tell-tale signs?
Over time, the ridges across your bridge upon which your strings sit may become worn and too deep. This will stop your strings vibrating properly and is a common cause for why strings and notes suddenly sound choked, broken or less resonant. You’ll spot that your instrument may become harder to play and you’re working harder with your bow to produce a decent sound. Again, your bridge could be the culprit.
Luckily, a replacement bridge won’t cost you much and you’ll be glad you did as your instrument will feel and sound much better for it. Here at Hidersine, we have a comprehensive range of bridges – take a look HERE.
Uncomfortable? Let’s Check Your Chin & Shoulder Rests
 Ask any experienced violinist or violist what they found difficult to get to grips with when they first started playing their instrument and we bet they’ll mention their chin and shoulder rests. Holding and positioning your violin or viola correctly on your shoulder and chin feels strange and unnatural the first few times you do it. This is totally normal and something all beginner players experience, so don’t get too hung up on it. Remember, the more you pick up and play your new violin, the faster you’ll feel totally at one with it.
The chin rest is a curved piece of wood or composite material that is attached to your violin at the base, alongside or covering the tailpiece. Originally designed in the Nineteenth Century by German musician Louis Spohr, the chin rest was initially conceived as a method for protecting the violin’s delicate tailpiece, but performers soon realised how it could be used to rest their chins on and make the violin easier to hold and play.
The shoulder rest attaches to the back of your violin and rests on your shoulder and collarbone. It serves two primary functions. Firstly, it makes your violin more comfortable to play and enables correct posture – helping you avoid injury. Secondly, it prevents your violin from slipping on your shoulder and therefore assists your performance of fast and technical playing where your body is naturally moving energetically and rapidly.
The chin and shoulder rest you decide to use is often a personal choice and you may find that the rests fitted to your instrument as standard aren’t quite suited to your body or the way you like to play. This is normal, and luckily, it’s easy to remove and change these fittings. There are a few considerations and checks you can perform to make sure you’re using both rests correctly first though.
- Are They at the Correct Height? If your chin rest is too high or too low, you’ll soon feel discomfort. If you have short neck, you’ll ideally want a lower chin rest, and if you have a long neck, a higher chin rest will likely feel more comfortable. Similarly, if your shoulder rest is too high or too low, it can force you into an improper playing posture which will make you uncomfortable and impact your playing.
- Are They Positioned & Shaped Correctly? You want your chin to form a snug fit in your chin rest, resulting in minimal movement. If you’re someone with a small chin, it’s likely you’ll need to use a chin rest with a smaller, deeper scoop or bowl. In the same regard, a smaller framed person will generally find a smaller, narrower shoulder rest more comfortable as opposed to a larger shoulder rest designed for broader shoulders.
It’s important to note chin rests are available as side and centre fit options. Centre fit chin rests sit directly above the violin tailpiece and side fit rest are located to the side of the tailpiece closest to your face. Again, this is personal choice, and you’ll soon discover how you prefer to hold your violin and which you prefer.
A quick note on fitting and positioning… if your instrument is producing an annoying buzzing noise, your chin rest could be the culprit. Make sure your rest isn’t touching the tailpiece – this is often the reason violins sometimes hum or buzz.
Hidersine violins and violas come complete with chin rests and shoulder rests designed with your comfort in mind. A combination of appropriate materials and ergonomically shaped designs ensure you won’t be battling with either of your rests and can instead focus on your playing. For students and beginners, our Hidersine Vivente Academy instruments feature Wittner hypo-allergenic chin rests specially designed and positioned to ensure the maximum comfort for new players.
Remember that your experienced music teacher or local bowed instrument store is on hand with expert guidance to help you find your perfect chin and shoulder rest if you feel uncomfortable playing your instrument at any point. Make sure to ask their opinion rather than continuing in discomfort.
Pay Attention to Your Sound Post!
The sound post in your instrument is a piece of wooden material located inside the body under the bridge that carries vibrations from the top (or table / soundboard) to the back of the instrument. Although not visible on the exterior of your violin or other bowed instrument, it is an essential component – often described as the ‘soul’ – that allows the instrument to resonate and produce a full and complete sound.
As the soundpost isn’t permanently fixed in place - rather, it is held tight by friction between the top and back pieces of wood, it can sometimes move out of position or fall completely. You’ll soon spot if your sound post has fallen or moved as your instrument’s tone will suffer and it’ll sound dull, less resonant, and quieter. If you hear something rattling around inside your instrument, that’ll most likely be your sound post that has fallen completely.
As the sound post is located inside the body of your instrument, it can be tricky to correctly reinstall and it’s always advisable to take your instrument to your local bowed instrument store or luthier to fix.

If you’re researching the process of music lessons or perhaps you or your child is about to embark upon violin lessons, you doubtless have some questions or concerns.
Learning a musical instrument is like learning a foreign language, and like a foreign language, the earlier you start, the easier it is. You may well have come across 7-year-olds who speaks 3 languages thanks to parents of differing origins. This apparently impressive feat is broadly just due to repeated exposure and constant trial and error (practice), and of course a child’s ability to learn new things quickly. So, the sooner kids start learning – or as an adult, the more you repeat a pattern - the more quickly it becomes second nature.
Whether the instrument lessons are for you or for a child, the same concerns broadly apply:
- How can I make sure these lessons are worth it?
- What preparations can I make to ensure the lessons go as well as possible.
- How can I judge how much progress has been made?
Each of the simple steps below can apply to any instrument, but as our area of expertise is that of bowed instruments, we’ll approach it from that perspective.
 1. Remember, your music teacher is a human.
Having spent much time with music teachers over the years, we can confirm that, yes, music teachers are indeed human. Just like the rest of us. They have the same set of things rolling around their heads as we all do. They likely have kids, and a mischievous dog that stole one of their shoes as they were leaving the house, and then have to pickup from an after-school club or to go to the supermarket after their last lesson finishes.
Essentially, their time is limited, the same as yours. So, every moment missed at the beginning of a music lesson due to any one of the points below not being followed, will not be regained. So make the most of this precious time. Your violin or cello tutor’s job is to get you from nowhere to somewhere, and they know what they’re doing, so trust them to help you or your child, and make the most of their experience.
 2. Make sure your instrument is in tune – before the lesson starts.
Bowed instruments like violins, violas and cellos need regular tuning, especially instruments often rented at minimal cost by local schools or music services. These instruments will likely have been used by multiple players over the years and would have received only minimal maintenance.
So, one of the first things you can do is decide to buy your own instrument – which really doesn’t have to cost a fortune - and then take good care of it. Or at least, pay a visit every few months to your local music store to get your instrument serviced.
The tuning pegs on most violins and cellos are kept in place by friction. The strings are always under tension, and therefore pull the pegs over time, whether being played or not. On many school-level instruments, the peg fitting is often not perfect, so they’re not that easy to tune. If you’ve ever tuned a guitar, remember that the tuning of traditional bowed instruments doesn’t work like that. (Although these rather clever instruments do work like that!)
As a priority, buy a Violin Tuner / Digital Tuner, or get one of the many free apps for your phone. Then ask your teacher to show you how to use it and how to tune your instrument. It’s straightforward, and even if you’re not perfect, you’ll get better over time, and even getting halfway good will reduce the time wasted at the beginning of your precious music lesson.
Remember, trying to tune a wayward instrument for 5 minutes of a 20 minute lesson is a 25% loss of productive time.
(We would mention that if you do want to start your violin / cello lessons with an advantage - and yes, this is a tiny sales pitch - picking up a Hidersine Vivente Academy instrument is a good call. They come with incredible, easy-tune pegs as standard. They’re really easy to use and making tuning so much quicker and easier.)
 3. Get to the lesson on time.
We made this point before, but it bears repeating. One of the things we hear the most commonly from music teachers – after the tuning issues, that is – is that of punctuality of students.
Of course, every now and then things go wrong, and unexpected circumstances conspire against us. In fact, research has shown that even music teachers are late sometimes! ;-)
If you’re having private lessons at a music school or in a private home environment, then your control over the attendance of the lessons is probably greater than if the lessons are at school. So for the purposes of this section, lets focus on the situation of at-school lessons.
Although educational institutions will vary in their approach to music lessons, it’s important to realise that many schools don’t value music lessons as highly as other subjects. It can be debated forever as to the rights and wrongs of this mindset, but the major implication of this is that not all schools or class teachers will care particularly whether your child makes it to their violin lesson at 11:45 on a Tuesday, in the middle of Biology. But, you’re paying for this lesson, and if you child is late by 5 minutes for their 20min lesson, or if the violin teacher has to come and find them, you’ve just wasted perhaps as much as £3 or £4 …and after just a few weeks, you’ve wasted the price of a decent Friday night takeaway! And no one wants that.
So what to do?
It’s standard procedure for music tutors to put up a lesson timetable on the school / music-department noticeboards at the beginning of each term or half-term. So, make sure your child goes and has a look, perhaps taking a photo with their phone (if allowed!)
Your instrumental teacher will also likely have been liaising with the school’s head of music, so they’ll also likely know the timetable too.
Plus, your teacher will usually send you a schedule by email, and if they don’t, then tell them you want one. They’ll likely be delighted to know you’re so interested.
 4. Take care of your instrument so it always performs its best.
This section is really an extension of the ‘tuning your instrument’ section but has a few wider implications.
If your violin, viola, cello or double bass isn’t in tip top shape, then the playing experience and the sound produced will not be as good as it could be. And that will be disincentivising… and that’s not good.
So, in basic terms, here’s what you need to check to make sure your instrument is ready for each lesson (or practice session):
- Clean the body of the instrument of finger marks and rosin dust. That Rosin dust especially will get harder to remove over time.
- Loosen the bow when not playing. This will ensure it’s in better condition for longer and is nicer to play with.
- Clean the strings after each lesson or practise session. Just wipe a microfibre cloth along their length a few times. It only takes a second, and the strings will last much longer and sound better too.
- Ensure it’s in tune – although I think we may have said that already..
- Keep the instrument in its case when not playing. It’ll avoid accidental breakages as well as intentional uses by little brothers as some kind of cricket / baseball bat…
- Keep it disinfected too. You can make sure that the instrument is free of germs and viruses by using an instrument disinfectant too. It’s worth doing this before and after a lesson if you want to err on the side of caution, especially if you, your child or the teacher has a winter cold.
Find out more about 'Taking care of your bowed instrument'.
 5. Hold the violin in your hands. Become familiar with it.
Musicians, just as other artists, often talk about their instrument becoming an extension of their own body. This affinity can start from the very beginning of your or your child’s musical adventure, and of course, this principle applies to any instrument, not just violin.
Hold your instrument in your hands. If your teacher has shown you how to hold the instrument correctly, just hold it there for a bit. Experience how it feels under the chin, in the case of a violin or viola, or between your legs in the case of a cello or upright bass.
Look at it. Poke things (carefully). Look at how the bridge is intentionally angled to the arched top of the instrument. See how the strings sit above the fingerboard and notice how the strings are smooth to the touch and how your fingers feel as you run them up and down the strings.
Hold the bow, again using the technique that your teacher has shown you. Feel the smooth concave of the frog (yes it’s called a frog) at the base of the bow. Feel the gentle pressure of your thumb on the stick. Feel how the bow gently touches the string…
This is perhaps a little Zen or ‘out-there’, but it’s essentially about building familiarity and a rapport with the instrument. If you or your child is unfamiliar with, or worse, afraid of the instrument, then playing it will feel alien for much longer… and your lessons and ultimately your practice will seem even more daunting.
Speaking of practicing...
 6. Practice. Even when you don’t want to.
If you had instrument lessons as a kid or if one of your kids is having lessons already, you know what a thorny issue this can be. Most kids – and even many adults - don’t really want to do their practice. (If, however your kids love their practice, you can rightly feel that you’re winning at life. Sadly, most of us don’t have that privilege.)
Unsurprisingly, practice, as they say, makes perfect. We all know that the more you do something, the better at it you become.
So, here are some great practice tips to set you or your child on track:
- Set a regular time for practice and stick to it. If you miss or avoid your scheduled practice appointment, then you'll know and it's harder to ignore.
- Have a location to practice. Much like the practice time, if you have a place about which you can say ‘this is where I practice’, quite soon, just being in that location will automatically make you feel like you’re ready to play.
- Be prepared. As well as your instrument, you’ll likely need your sheet music and a music stand, and maybe a pencil to make notes. Make sure these things are setup ready to go in advance, ideally leaving them where they are, in your practice location. Then, the 15mins of practise isn’t actually 5 minutes of finding the music stand and the music, and 10mins of playing.
- Be realistic. If you’re learning as an adult and really keen, then perhaps 30mins a day is doable and will pay dividends, but if it’s your 9-year-old who really just wants to get back to staring at a screen, perhaps something more realistic is better. Just 10 minutes of practice every day will make a huge difference.
- Set a goal. At the start of each week of practice, perhaps just resolve to get the first 4 bars as good as you can. Even though that may not seem particularly ambitious, feeling the achievement of reaching that goal is worth its weight in gold and encourages greater goals in the future.
- Keep a record of practice. Maybe your teacher will give you a practice diary book, or perhaps you’ll create a chart on the wall to be ticked off when the daily 15 minutes is complete, or perhaps you can use one of the many apps available. Whatever you choose, keep it simple and realistic, but be accountable for the each session.
- Record yourself. Just put your phone in selfie mode and press record. Being able to listen or watch yourself back is really powerful. You can hear where you went wrong, and where you went right. It’s what all the top musicians and sportspeople do to improve, so there’s something in it, for sure.
- Don’t give up. Just try again. If you’re getting super frustrated, stop for a minute. Breathe, and go again. Baby steps is what it takes.
 7. Join a band or ensemble:
Playing in a group, a band, or ensemble will genuinely be one of the best things you’ve ever done. The feeling of being part of a greater whole as well as the process of cooperation is incredibly rewarding. This applies equally as an adult learner or as a child.
To be fair, the chances are that your local music service or county music hub will have a lot of ensembles options for kids. It’s usually their job - often with funding from the Arts Council - to provide musical experiences for kids learning at school. So, there is bound to be a beginner's orchestra that requires a minimal level of proficiency to join.. and then as the youngsters progress, they can join more advanced orchestras. It’s a genuinely lifechanging experience and is also a great way for your kids to gain musical friends. If musicality is normalised amongst their peer group, then the act of playing, rehearsing and practicing becomes just a regular part of life that yeilds great rewards.
(If you happen to live in the USA, your school or college music program will likely be quite advanced when compared to the standard British system. So, take advantage of it!)
For adult learners there are not quite so many options for ensemble playing, but they still exist. Once you’re of a reasonable standard, joining a local orchestra is a great idea. You’ll be surprised how many there are out there. Or perhaps ask your teacher if they have any other pupils of a similar age or standard who fancy playing together. A simple duet, trio or quartet will transform your musical landscape, plus it's another great form of socialising too.
 8. Listen to violin music sometimes.
Whether you or your child’s preferred music is Ed Sheeran, Einaudi or Elgar, taking a little time to listen to your chosen instrument played really well is always worthwhile.
If you’re able to attend an occasional local orchestra's concert, or watch one of the BBC Proms every now and then on TV or just ask your teacher to play a little for you, hearing first-hand what is possible is always inspiring. However, simply searching YouTube for fun violin or cello players is surprisingly fun and useful too. There are some fantastic players online who present bowed instrument playing in an approachable and down-right fun way. Your 13-year-old will be pleased to know that they’re even on tiktok too!
 9. Love it & Enjoy it.
Enjoy it. Really do. Take it all in. Enjoy the process of learning and have a realistic goal. Then when you reach that goal, set a new one. Take pleasure in every little step forward becuase you will never regret learning to play a musical instrument.
As someone probably with a wispy beard and undoubtedly wise once said, “It does not matter how slowly you go, only that you do not stop.”
__
But what type of music lesson is right for you personally?
Group Lessons? Individual Lessons? Should I learn with a Music Hub / Local Music Service / Peripatetic, Private Lessons / Online, Zoom lessons.
Read our handy guide to 'What type of Music Lessons are best for me.. and what will they cost'.
(Note to grammar pedants, like the writer: We know that we have used the internationally recognised / recognized spelling of 'practice' in both noun and verb forms throughout. Although we're British and should also therefore use 'practise' for the verb, we didn't.)

You’re ready to set out on your musical journey and you want to have lessons. Great! You won’t regret it, that’s for sure. But where do you start? What type of music lessons should you choose?
Maybe your kids can learn at school, or maybe they should get private lessons instead. Which is better and what are the implications?
Or if the violin or cello lessons are for you or another adult, what are the options? Maybe you’d consider online lessons via video? And, then what do they cost, and what can you expect to get for your money?
So, let’s go through this one by one...
 What do Music Lessons (specifically Violin / Cello Lessons) cost?
Writing from the United Kingdom (UK), we can only comment on the going rates here at the current time, early 2022. But this should serve as a good indicator of music tuition prices overall.
Whole Class Lessons (Primary): Usually Free, with instruments provided by the school.
Lessons at School:
Group Lessons: Approx £6 - £8 for 15 mins (shared between 2 to 4 children)
Individual Lessons: Approx £12 - £16 for 15 mins (one child only)
Private Lessons / Online Video Lessons (Adults or Children):
£13 - £18 for 25 / 30 mins
£25 - £35 for 50 / 60 mins
We should once again caveat these figures by saying that all these prices will depend upon a number of factors, not least of which is your location within the UK. Prices in London, for example, are generally higher than in North Wales or Lincolnshire.
--
So lets take a look at the most common types of music lesson options:
Kids Music Lessons:
Skip straight to Lessons for Adults
 Learning at school:
It is likely that your primary or secondary school works with an external company to provide instrumental lessons to pupils. Sometimes these companies are private enterprises and sometimes they’re local council funded operations. Either way, this is the most common starting point.
Whole class lessons: (Primary)
Some primary schools offer whole class instrument lessons as part of the weekly lesson plan. We have seen whole class ukulele lessons, cornet lessons, guitar lessons and hand percussion lessons too. This is a great introduction to the concept of learning music, although it’s not ideal for much more than that. But it does allow you and your child to explore musical avenues, risk free.
Lessons at school:
Usually available both in Primary and Secondary, these school lessons will usually be administered by an external company, contracted to deliver lessons during school time. Most schools will offer a certain availability of lessons for the most popular instruments such as violin, cello, clarinet, flute, guitar, drums etc, and the more demand there is from pupils, the more lesson times will be available. So the likelihood of harp or bassoon lessons in school is low.
At-school lessons will generally be available in Group Lessons (2 to 4 per lesson) and Individual lessons (1 on 1). The timeframe of the lessons can vary, but most usually the group lessons will be 15 of 20 minutes long when shared between 3 or 4 pupils, and the individual lessons will be 10 to 20 minutes. The cost of these will vary depending upon the company and part of the country, but as you’d expect group lessons are cheaper, but arguably not as impactful.
Group lessons are fine if all 3 kids are up for it and attentive, but if you’re paying £6 a week for a group 15-minute lesson and one of the other kids is not especially attentive, then it’s not necessarily money well spent.
However, it may be a great introduction to music lessons, and a way of checking commitment levels and your child’s desire to progress. Plus, it’s cheaper, and that can be very important.
Group lessons are also a great way of encouraging more reluctant or shy children to give it a go. Having a friend or even brother or sister alongside them in a lesson may be just the thing they need to convince them to try something new.
Individual lessons at school will be more expensive, but it does confer quite a few advantages, the biggest of which is that the teacher will be able to devote all their time to your child without distraction. You’ll therefore see the most benefit in the shortest possible time. They’ll rattle through their grades much faster this way, and even if that’s not a particular concern, they’ll likely just enjoy it more.
Music Lesson options for Adults & Kids:
Private Music Lessons / Peripatetic Music Tutors:
Employing the services of a private teacher is without doubt the best way to go, if you can.
 Learning privately, you will likely have a longer lesson, as the assumption would be that of more commitment from the outset, but that longer lesson will cost a little more than a school lesson. Although, when looked-at on a minute-by-minute basis, 30 mins with a private tutor will be cheaper than 10 minutes of lessons at school.
You’ll also have flexibility of location too, and likely more flexibility of lesson time and duration.
If you want to start off with 20 minutes for a 6-year-old, that’ll be fine. Then perhaps increasing to 30 minutes once they’re a few years older, and once into teenage years an hour-long lesson will be appropriate. All this can be assessed by your private teacher and things adjusted accordingly.
 As an adult however, even as an absolute beginner, a 50 minute / 1 hour lesson is a good idea. As you’ll be committed to the process and pay attention for longer periods, you’ll gain so much more from a more intensive teaching for this length of time. You’ll also have more questions than a younger learner, so this time period allows more opportunity for the two way communication which is essential to a great learning experience.
One of the other major advantages of private music lessons (whether Violin, Cello, Piano lessons etc) is that you will likely travel to the teacher’s house or their teaching studio, and in doing so, you can be sure of the quality of equipment that they have available; the availability of a music stand; a quiet location without other kids or schoolteachers walking through the room. Plus, you or your child gets their undivided attention too… and that’s always a good thing.
 Online Video / Zoom Music lessons:
Writing this at the end of 2021, as we are, zoom lessons have become somewhat of a regular feature in our lives, and they have proved themselves very useful indeed. It’s still arguable that in-person lessons are better whenever possible, but sometimes they’re just not.
Some of the advantages to online lessons:
- No travelling for either yourself or the teacher. More time to learn.
- You may well feel more at home in your own environment, and some adults and children find this approach helpful if they’re perhaps a little shy or have particular needs.
- Your learning and practise environment is completely within your own control.
- You can learn from literally anyone, anywhere in the world: Fancy a lesson from a Russian virtuoso? That’s no problem online, and cheaper than a flight to Moscow every week.
- But you will need to be more disciplined in your approach, as the pressure on you will arguably be lighter than meeting face to face.
 Learning from YouTube?
Fast becoming extremely popular in pretty much every area of expertise, learning via Youtube videos can be very fruitful indeed. There are countless string players who have uploaded great lesson series for all standards of player.
You can also complement regular face to face lessons with a bit of YouTube learning too. Searching for ‘Easy Christmas songs for Violin’ or ‘Learn Ed Sheeran for Violin’ will result in a whole bunch of options. It’s never been easier to learn an instrument!
Here at Hidersine, we’re very proud of our collaborations with several professional educators and the resulting suite of Violin, Cello and Double Bass technique videos that are available on our channel. These videos help explain a number of the most commonly taught playing techniques from Basic bow holding to Pizzicato to Spiccato and far beyond.
Check out the free HIDERSINE TECHNIQUE VIDEOS here.
In Summary:
- Younger kids can get the learning music bug from group or individual school lessons which are easy to access and are delivered in small, weekly chunks.
- Once a little progression is made, if at all possible, find yourself a good local music teacher who you and your kids connect with.
- Adult learners should go ahead and find a local teacher. Again, find someone who ‘gets’ you, and tell them what you’d really like to achieve. Then you can work towards to goal together.
- If travelling is an issue for you, or if time pressure is too great, then go for the Online Video Lesson option. You can still make great progress this way, but it does require a little more self-discipline.
- And don’t be afraid to learn from YouTube. Anyone who knows more than you is worth listening to… and it adds variety, and that, apparently, is the spice of life.
If you've now decided that you or your child are definitely going to get some Music Lessons, how can you ensure you get the very best results?
Have a read of our guide to 'Getting the most out of your Music Lessons".
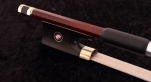
Don’t underestimate your bow’s role in shaping your playing experience! A poorly maintained bow will make your instrument harder to play and sound bad. Before you know it, your enjoyment and progress with your instrument will start to diminish.
Here’s 7 simple steps for taking care of your bow…
Cleaning Your Bow’s Stick, Frog and Other Essential Parts:
 Remember, you hold your bow for prolonged periods which can make your bow’s frog dirty and tarnished pretty quickly if not properly cleaned after use. It’s not too nice to talk about, but our skin gets oily and sweaty, and these secretions are easily transferred to your bow - especially as your bowing hand moves so much.
If not regularly cleaned, these skin deposits will soon start to take their toll on the frog, stick and hair of your bow. Make sure to wipe your bow down with a dry, lint-free microfibre cloth after every practice session, lesson and performance.
*Never use solvent or alcohol-based materials. Hot water is a no-no too as it can cause your bow’s stick to swell and become damaged.
Cleaning Your Bow Hair & Removing Rosin Residue:
Applying rosin to your bow is another crucial element in how your instrument performs… more on that in a moment. Left to reside on your bow frog and other contact points, you’ll soon find your bow feels sticky & unpleasant in your hand and will be harder to use. Make sure to wipe off rosin dust with your trusty dry, lint-free microfibre cloth every time you’ve finished playing.
Pay particular attention to cleaning your bow hair so it’s free of rosin build up. This is a very common oversight among many players and is a reason their bow, and ultimately their playing, suffers.
Excess rosin deposits will cause your bow hair to stick too much and feel uncomfortable to play, plus your instrument will sound unpleasant. Again, use your microfibre cloth to wipe down the entire length of your bow hair, making sure to wipe both sides. This will remove any loose rosin dust.
This isn’t enough to keep your bow in tip-top condition though! Performing a deep clean on your bow hair around once a month is great idea and will remove the natural clumps of rosin and pesky skin deposits that easily build up.
Simply loosen your bow hair or release it completely from the stick by fully untightening the screw. Using warm water and a light brush such as a toothbrush, comb and massage through your bow hair, making sure it doesn’t become twisted as you do so. Also make sure to avoid getting water on other parts of your bow such as the frog, tip or stick.
This deep clean doesn’t take long and is easy to do. Trust us, you’ll really feel the benefit in your playing… Your bow will feel as good as new.
Despite your best cleaning efforts, most leading bowed instrument players have their bow re-haired every three to four months. If you’re a beginner or are advancing through your higher exam grades, it’s recommended you have your bow re-haired every six months. Your local bowed instrument specialist or music store will be able to do this for you for a small fee.
Why not try our Hidersine Reserve21 rosin for a fabulously low-dust, high grip playing experience!
Broken Bow Hairs… What Should I Do?
An average bow consists of anywhere between 140 to 180 individual hair strands. Occasionally individual hairs come loose at the frog or tip mounting and dangle free.
When this happens, many beginners believe this is a cue to have their bow re-haired. Don’t worry though, this is not necessary. Your bow will still perform perfectly well despite losing a few of its many strands, and your six monthly re-hairing will take care of any longer-term issues.
When a hair comes loose, it’s tempting to simply pull it out and continue playing. Don’t make this mistake though! This can damage your bow’s frog or tip mounting. Instead, use a sharp pair of scissors or knife (always be very careful and watch those fingers!) and simply cut the rogue hair short and as close to the frog or tip as possible.
Loosen Your Bow When Not in Use
It’s important to loosen your bow hair after every practice and performance. Keeping your bow under tension when not in use is a sure-fire way to cause it to warp and make it feel uncomfortable to play.
Remember to re-tighten your bow hair the next time you pick up your bow to begin playing.
Choosing the Best Rosin for Your Bow
 If you’re a beginner, applying rosin to your bow can feel a bit strange the first few times you do it. Quite frankly, dragging a block of sticky hard sap along your shiny new bow hair and shedding dust all over it feels wrong, but it’s an essential aspect in ensuring your bow performs properly, feels good and produces the best sound from your instrument.
Firstly, make sure you choose the right rosin for your instrument and for your playing style. There is a level of subjectivity here, and it’s worth considering that what personally feels best to you is generally a good way to go. However, a ‘light’ rosin is typically a good starting point for beginners and is more commonly used on violins and violas.
Harder than ‘dark’ rosin, a light rosin will help produce a bright and articulate sound, perfect if you’re a beginner who needs to focus in on the fundamental characteristics of your instrument and playing. A softer ‘dark’ rosin is naturally grippier and will produce a warmer sound that accentuates the more nuanced expressions of advanced techniques.
The climate you live in or are performing in also plays a role in which is rosin to choose. Softer rosins perform better and are more suited to colder climates, with lighter, harder rosins offering a better choice in warmer temperatures. Our world famous Hidersine Rosin is made from a carefully selected blend of wax and pine resin and is still made in the same way, using the same recipe first developed by Francis Hider almost 100 years ago. Find everything you need to know about rosin in our article ‘All About Rosin’ HERE.
Applying Rosin To Your Bow
So, what are the best practices for applying rosin to your bow?
First up, tighten your bow hair. Remember, you correctly loosened it after your last practice… Well done for that! If you’re applying a brand new block of rosin for the first time, it will be shiny and smooth, making it more difficult to apply. Here’s a little trick - simply score or roughen your new rosin slightly using a piece of light sandpaper or another rough surface before applying. It adheres more quickly and effectively this way.
Lightly grip your bow at the frog and slowly and evenly run your rosin along the entire length of the bow hair from the frog to the tip, and back to the frog again. If your bow is new, you’ll need to repeat this quite a few times (around twenty to thirty times). If you’re simply preparing your existing bow before another practice session, repeat this up-down movement around five to ten times, then pause and check to see if your bow is sufficiently rosined by testing your bow across your strings.
You will come to understand exactly how much rosin is enough in no time at all, but here’s a simple guide to help you on your way:
Insufficient rosin: This will produce little to no sound at all – a very quiet and hollow sound at best. You’ll find yourself pressing very hard to produce any sound from your instrument. Time to apply a bit more.
Not quite enough rosin: Your instrument will produce a louder sound now, but you’ll spot that it is broken and inconsistent. A little more is needed to produce that nice full sound.
The right amount of rosin: There you go… you bow is now moving freely and consistently across the strings without you having to press too hard. Your instrument sounds warm and loud with unbroken notes.
Too much rosin: Your bow is suddenly difficult to move across the strings as it feels like it’s sticking to them too much. You can see rosin dust coming from your bow as you move it and your instrument sounds scratchy and rough. Time to grab your microfibre cloth and wipe a bit off.
Storage & Transportation
Just like your bowed instrument, your bow is delicate and made mostly from natural materials that are sensitive to temperature and humidity changes.
It’s important you store and travel with your bow in its case or a bow holder to protect it from being chewed by the dog at home, sat on and snapped on the bus or warping next to the heat of your cosy open fire.
Our Hidersine instrument outfits come with cases and gigbags featuring dedicated bow holders to safely tuck your bow out of harms way when not in use. Make sure to get into the habit of putting your bow away in its case along with your precious instrument after every playing session.
What about taking care of your instrument? Find out how HERE.