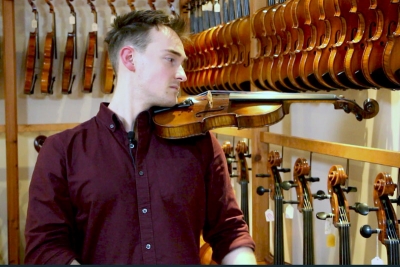
Now that you've bought your new violin, viola, cello or double bass, it’s important you respect and take care of it. After-all, you wouldn't buy a brand new car and immediately start driving it carelessly and never clean it, would you?
A neglected instrument will sound bad and will be difficult to play and before you know it, your enthusiasm will fade and all your hard work will amount to nothing.
Keeping your bowed instrument clean and well maintained is a crucial aspect of any good musician’s routine. The good news is that it’s really simple to achieve with correct understanding, a little diligence and the correct cleaning accessories.
Here’s how to keep your Hidersine instrument in tip-top condition...
A clean slate!
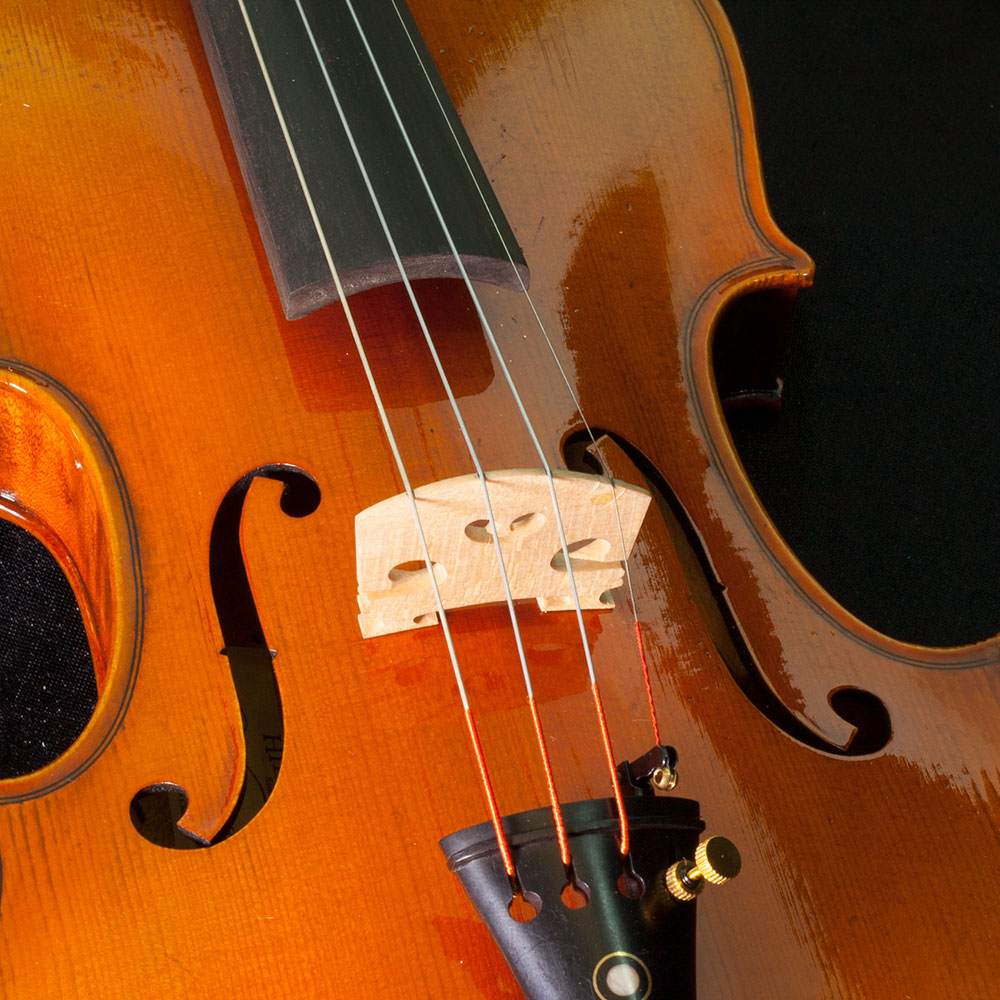
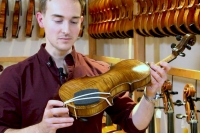
Let’s face it, our skin gets oily and sweaty. This is easily transferred to your violin, viola, cello or double bass when you’re playing. If left to reside on the body and fingerboard, these natural secretions will start to take their toll on your precious instrument and can even strip its varnish.
Using a specially designed cleaning and varnish reviver solution such as Hidersol or Hill Preparation Cleaning Liquid, apply a small amount to a dry, lint-free microfibre cloth and wipe down the body after you’ve finished playing. Trust us, you’ll really feel the benefit the next time you pick up and play your instrument.
Make sure to clean your fingerboard and bow too - but use a second solution-free microfibre cloth for this. Do not apply varnish reviver to your fingerboard or bow. HERE’S our guide to cleaning your bow and fittings.
*Never use solvent or alcohol-based materials. Hot water is a no-no too as it can cause your instrument’s tonewood to swell and become damaged.
Let’s Remove That Rosin Residue
As part of your post playing routine, make sure to wipe away rosin residue and dust. That’s the layer of white dust you’ll notice on your strings, fingerboard and body, (it gets everywhere!)
Our world famous Hidersine Rosin is made from a carefully selected blend of wax and pine resin and is still made in the same way, using the same recipe first developed by Francis Hider almost 100 years ago. It is specially developed to cause no harm to your instrument – however, it will adhere to your instrument over time and make it feel sticky and unpleasant to play.
Had enough of rosin dust? Why not try our Reserve21 rosin? An exquisite handmade rosin enriched with British beeswax for a fabulously low-dust, high grip playing experience!
Strings! Clean Them / Change Them
 Along with your instrument’s body, fingerboard and bow, it’s important that you clean your strings regularly. Old, dirty and worn strings not only sound bad, but they will also make your instrument harder to play. They can even cause injury to your wrist and shoulders as you will have to apply greater pressure to produce notes, thus causing undue stress to your body.
Cleaning your strings is a quick and easy job, and something you should do after every playing session. Simply loosen the strings slightly and wipe down the entire length of the strings from the tailpiece to the top of the fingerboard with a dry, lint-free microfibre cloth. Remember to clean the underside of your strings too and pay special attention to the bridge and tailpiece areas as this is where that pesky rosin dust easily builds up.
Using a specially designed string cleaner is a great idea. Here at Hidersine, our instrument technicians use Kyser String Cleaner & Extender in the workshop. Although there are other brands available, we find this does an excellent job!
*Never use solvent or alcohol-based materials. Hot water is a no-no too as it can cause your instrument’s tonewood to swell and become damaged.
The frequency to which you change your strings is dependent on several factors such as how often you play, your general level of instrument maintenance, and string type (gut-core strings wear more quickly and therefore require changing more often than steel-core). We recommend changing your strings around every 4-6 months if you’re someone who plays and practices every day. If you’re performing too, you’ll want to change them around every 3 months.
Storage & Transportation
Now you have your precious bowed instrument, it’s vital you store it and transport it in a good quality case or gigbag. Although it’s tempting to display your new violin, viola, cello or double bass in your front room so you can stare lovingly at it even when you’re not playing, this is a bad idea! Bowed instruments are delicate and leaving yours out of its case means it can easily be knocked over, sat on or struck with something. Give yourself the peace of mind that it is safely tucked up in its protective case away from harm.
Always pay attention to temperature! As with many musical instruments made of natural woods, they are sensitive to extremely hot and cold temperatures, humidity and moisture. Never place your instrument by a hot fire or leave it in a particularly cold or damp room – and definitely never leave it outside! Remember, storing it in its case helps provide some protection from temperature changes. Even if you live somewhere with a temperate climate, make sure to invest in a humidifier - especially if live somewhere especially dry, hot or cold.
Finally... never transport your violin or bowed instrument without a padded gigbag or case. Jumping on the bus to your next rehearsal or lesson with your violin in your hands without a case will soon see you forking out for a replacement. All Hidersine instrument outfits come complete with a hardcase or padded gigbag specially designed for maximum protection. Our extensive range of cases offer comfortable, lightweight, easy and safe ways for you to travel with your instrument.
Viruses… what can I do about them?
 We’ve covered how your hands and fingers leave natural oils and secretions on your instrument. If you’re concerned about bugs, germs and viruses living on your violin after others have picked it up or played it, it’s a good idea to make sure you have an instrument disinfectant included in your accessory arsenal.
Our friends at Champion have developed a UK-made Disinfectant that has been formulated to safely disinfect your bowed instrument. Featuring an anti-viral and anti-bacterial formula and a non-hazardous and fragrance-free solution, it’s a great way to ensure that little extra peace of mind when it comes to keeping your instrument germ-free. Simply spray a small amount onto the required area and leave for at least 30 seconds then wipe off with a dry, clean cloth. Where a deep clean is required, spray area a few times and allow solution to sit on the surface for 15 to 20 minutes.
Have a 'google' for Champion Disinfectant and you'll find it easily.
What about taking care of your bow? Find out how HERE.
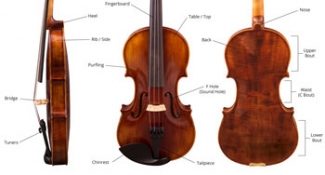
It’s safe to say there are a lot of components that make up a violin. Of course, this means there’s also a comprehensive lingo to understand too which can often be confusing, especially if you're a beginner and new to the wonderful world of the violin.
Not sure what the ‘purfling’ is, or confused where the ‘tuners’ are exactly? Don't worry, here's our handy Hidersine anatomy of the violin guide to help you understand what all the different parts of the violin are called.

Stacking the Pads
Just a little bit more height
You may find that using one of the support pages under one of the larger pads is still not right for you.
In this instance, you can 'stacking' the pads. This will create one overall larger pad as shown in the picture.
This arrangement is often the most useful for childen as it provides lots of support and is also very comfortable.
The Final Step - Make music
Now that you have found the perfect fit for your Hidersine Huber Shoulder Pad, it is time to practice and create music.
Making Adjustments
What are the support pads for?
Now you may find that one combination of the pads is just about right, but you would like the violin to sit up just a little higher. Some people call this "compensating for a sloping shoulder". In this instance, you should use one of the Support Pads. Place them under one of the short edges of your pad of choice.
They actually have an adhesive backing which you can peel off and use to create a permanent join if you'd like to.
When using the support pads, as you'll see and feel, the angle of the pad has been altered just a little. But it's just enough to bring the scroll of the violin a little further up, making it easier for you to hold and play.
Finding your fit
Which pad(s) should I use?
Now that you have got the fixing band in place and have hooked it over the rib. It is time to find your "fit". Time to find the pad or pads that fit your particular body shape.
Start with the thinner of the 2 large pads and test it under your chin.
Your goal is to be able to hold the violin between your chin and shoulder almost without any effort at all. Your left hand should not be taking the full weight of the instrument.
If it doesn't feel quite right, try the larger, angled pad or even try a combination of them. (If using the angled pad, do make sure that the angled section is facing towards the bottom of the instrument.)
Getting Started - Hooking the Fixing band
Positioning the Pad and hooking over the rib
After successfully looping the fixing band through the tailglut, it is now time to hook the band over the rib of the instrument.
Place your chosen pad in position and then simply pull the fixing band up and over the rib, hooking it onto the top side of the instrument.
Getting Started - Looping the Fixing Band
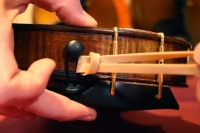
How do you fix the pads in place using the fixing band?
Using one of the supplied fixing bands, loop it through the tailgut and then hook it over the rib of your instrument. (See the demonstration image in the next step).
Ensuring the fixing band is securely looped through the tailglut and hooked over the rib, you can be sure of adequate tension to keep the pad in place.
Preparation
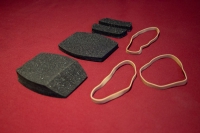
What comes in the box?
In the box you will find 4 Hidersine Huber Shoulder pads and 3 special fixing bands.
There are a variety of pads in the box which are designed to help you achieve the perfect fit:-
- 1 Thin pad
- 1 Thicker, angled pad
- 2 Support pads
Although there are 3 special fixing bands, you only need one to fit the pads. The other two are to be put aside as spares in case one breaks or is lost.
These fixing bands are specially sourced within the United Kingdom specifically for the Hidersine Huber Shoulder Pad to ensure that they do not harm your instrument's lacquer. Inferior elastic bands have been known to cause problems some types of lacquer. These do not.
More...
WIN !!! Hidersine Rosin & Thomastik Infeld string set for your instrument of choice.
Clear Design
Be in with a chance to WIN a block of Hidersine Deluxe Rosin & set of strings for your instrument of choice from our friends at Thomastik Infeld. WORTH UP TO £345!
String sets.
VIOLIN: Peter Infeld PI100 VIOLA: Peter Infeld PI200 CELLO: Versum Solo
We are giving away this great prize to one winner every month… Winners will be chosen & contacted on the last Thursday of every month.
Entry to this giveaway is open worldwide.
It is FREE and easy… simply complete as many of the actions in the box below as you can for a greater chance of winning!
Thanks for taking part & good luck!
Hidersine Web Pop Up Giveaway - Rosin & Thomastik string set

Have you ever thought about whether you're getting value for money when paying for music lessons?
 Starting violin or other bowed instrument lessons is an exciting time. For school pupils, they’re on the road to learning the essential skills needed to become the virtuoso they’ve always dreamed of being.
Whether they want to be wowing audiences as a soloist or have set their sights on joining a string quartet or orchestra, it’s key that they master the basics first. Those initial music lessons, as well as plenty of personal dedication, are crucial to achieving something brilliant.
So, the new school term has begun, your child has got their new beginner violin outfit, they’ve applied rosin to the bow, and they turn up to their first group lesson raring to go. The lesson is twenty minutes – plenty of time to learn lots of new things.
The teacher shows them some bow and fingering techniques to get them started – nothing too tricky. That sound though… Yuck! Some of the violins are out of tune! Before they can continue, the teacher needs to tune them so that they’re all in pitch.
Having to tune even one or two violins in a group lesson can take up to five minutes – that’s five minutes lost from a twenty-minute lesson! 25% of learning and playing time lost to tuning!
 Let’s do some quick mathematics.
Weekly music lesson = 20 minutes
Potential time spent tuning = 5 minutes per lesson
Weeks in a school year = 39 weeks
Total lesson time per school year = 780 minutes
Total time lost to tuning per year = 195 minutes
That’s over 3 hours of valuable learning time spent tuning every school year!
At an average cost of £6 per 20-minute group lesson, this means you could be wasting nearly £60 of the £235 you’re spending on music lessons a year!
We understand that it’s tempting to go for the cheapest beginner violin you can find when starting out while you ‘see how it goes’. Consider this for a moment though. Often, cheap instruments purchased from a mass retailer, rather than a specialist music store, will be by no means the best quality. Badly made instruments sound bad, are uncomfortable to play and slip out of tune easily. They can be the reason for actual learning and playing time in lessons to be cut short.
Here’s some more detailed information on how to avoid buying a bad beginner instrument.
 Hidersine Vivente Academy.
Voted ‘The UK’s Best Bowed Instrument’ by the Music Industries Association, Hidersine Vivente Academy violins benefit from being fitted with Wittner’s Finetune pegs to make tuning a whole lot easier and faster.
The clever, German-engineering employed in Wittner’s Finetune pegs allows the internally geared peg to be turned in a controlled way, without the main shaft of the peg ever losing contact with the pegbox. This means players can make tiny, incremental increases or decreases in pitch - just like tuning a guitar. Getting an instrument in tune, and keeping it there has literally never been easier… So now valuable lesson time can be spent learning and playing – not tuning, and re-tuning.
All Hidersine Vivente Academy instruments are inspected and set-up ‘ready to play’ in our UK service workshops. You can buy with confidence and rest assured that it will be ready to go from the moment you sit down in that all-important first music lesson.
Lesson learned.
Yes, tuning is a key skill to learn. It’s worth practising. But, it’s not something that should be standing in the way of a student’s playing time or a teacher’s planned teaching time. Teachers care about their pupil’s development, and not being able to keep their lesson plans on track due to the constant interruption of violins that won’t stay in tune is a frustration, and ultimately sees you wasting your money.
For students, time spent tuning can suck the fun out of music lessons. It can ultimately be the reason their initial enthusiasm diminishes and is replaced with interests in other, sometimes non-musical academic pursuits.
Buying a high-quality beginner instrument will go a long way to ensuring the money and effort spent on music lessons isn’t in vain. Hidersine Vivente Academy violins retail at under £300, and it’s always worth speaking to your local music store about their Hidersine rental schemes if this is too much of an initial outlay. You could be taking advantage of the benefits these beginner outfits offer, without the upfront cost.
Don’t let a poor-quality, cheap beginner violin hamper the musical journey.
-
Want to brush up on what you’ve learned lately? Check out our FREE violin, cello and double bass technique videos in partnership with the European String Teachers Association (ESTA) HERE.

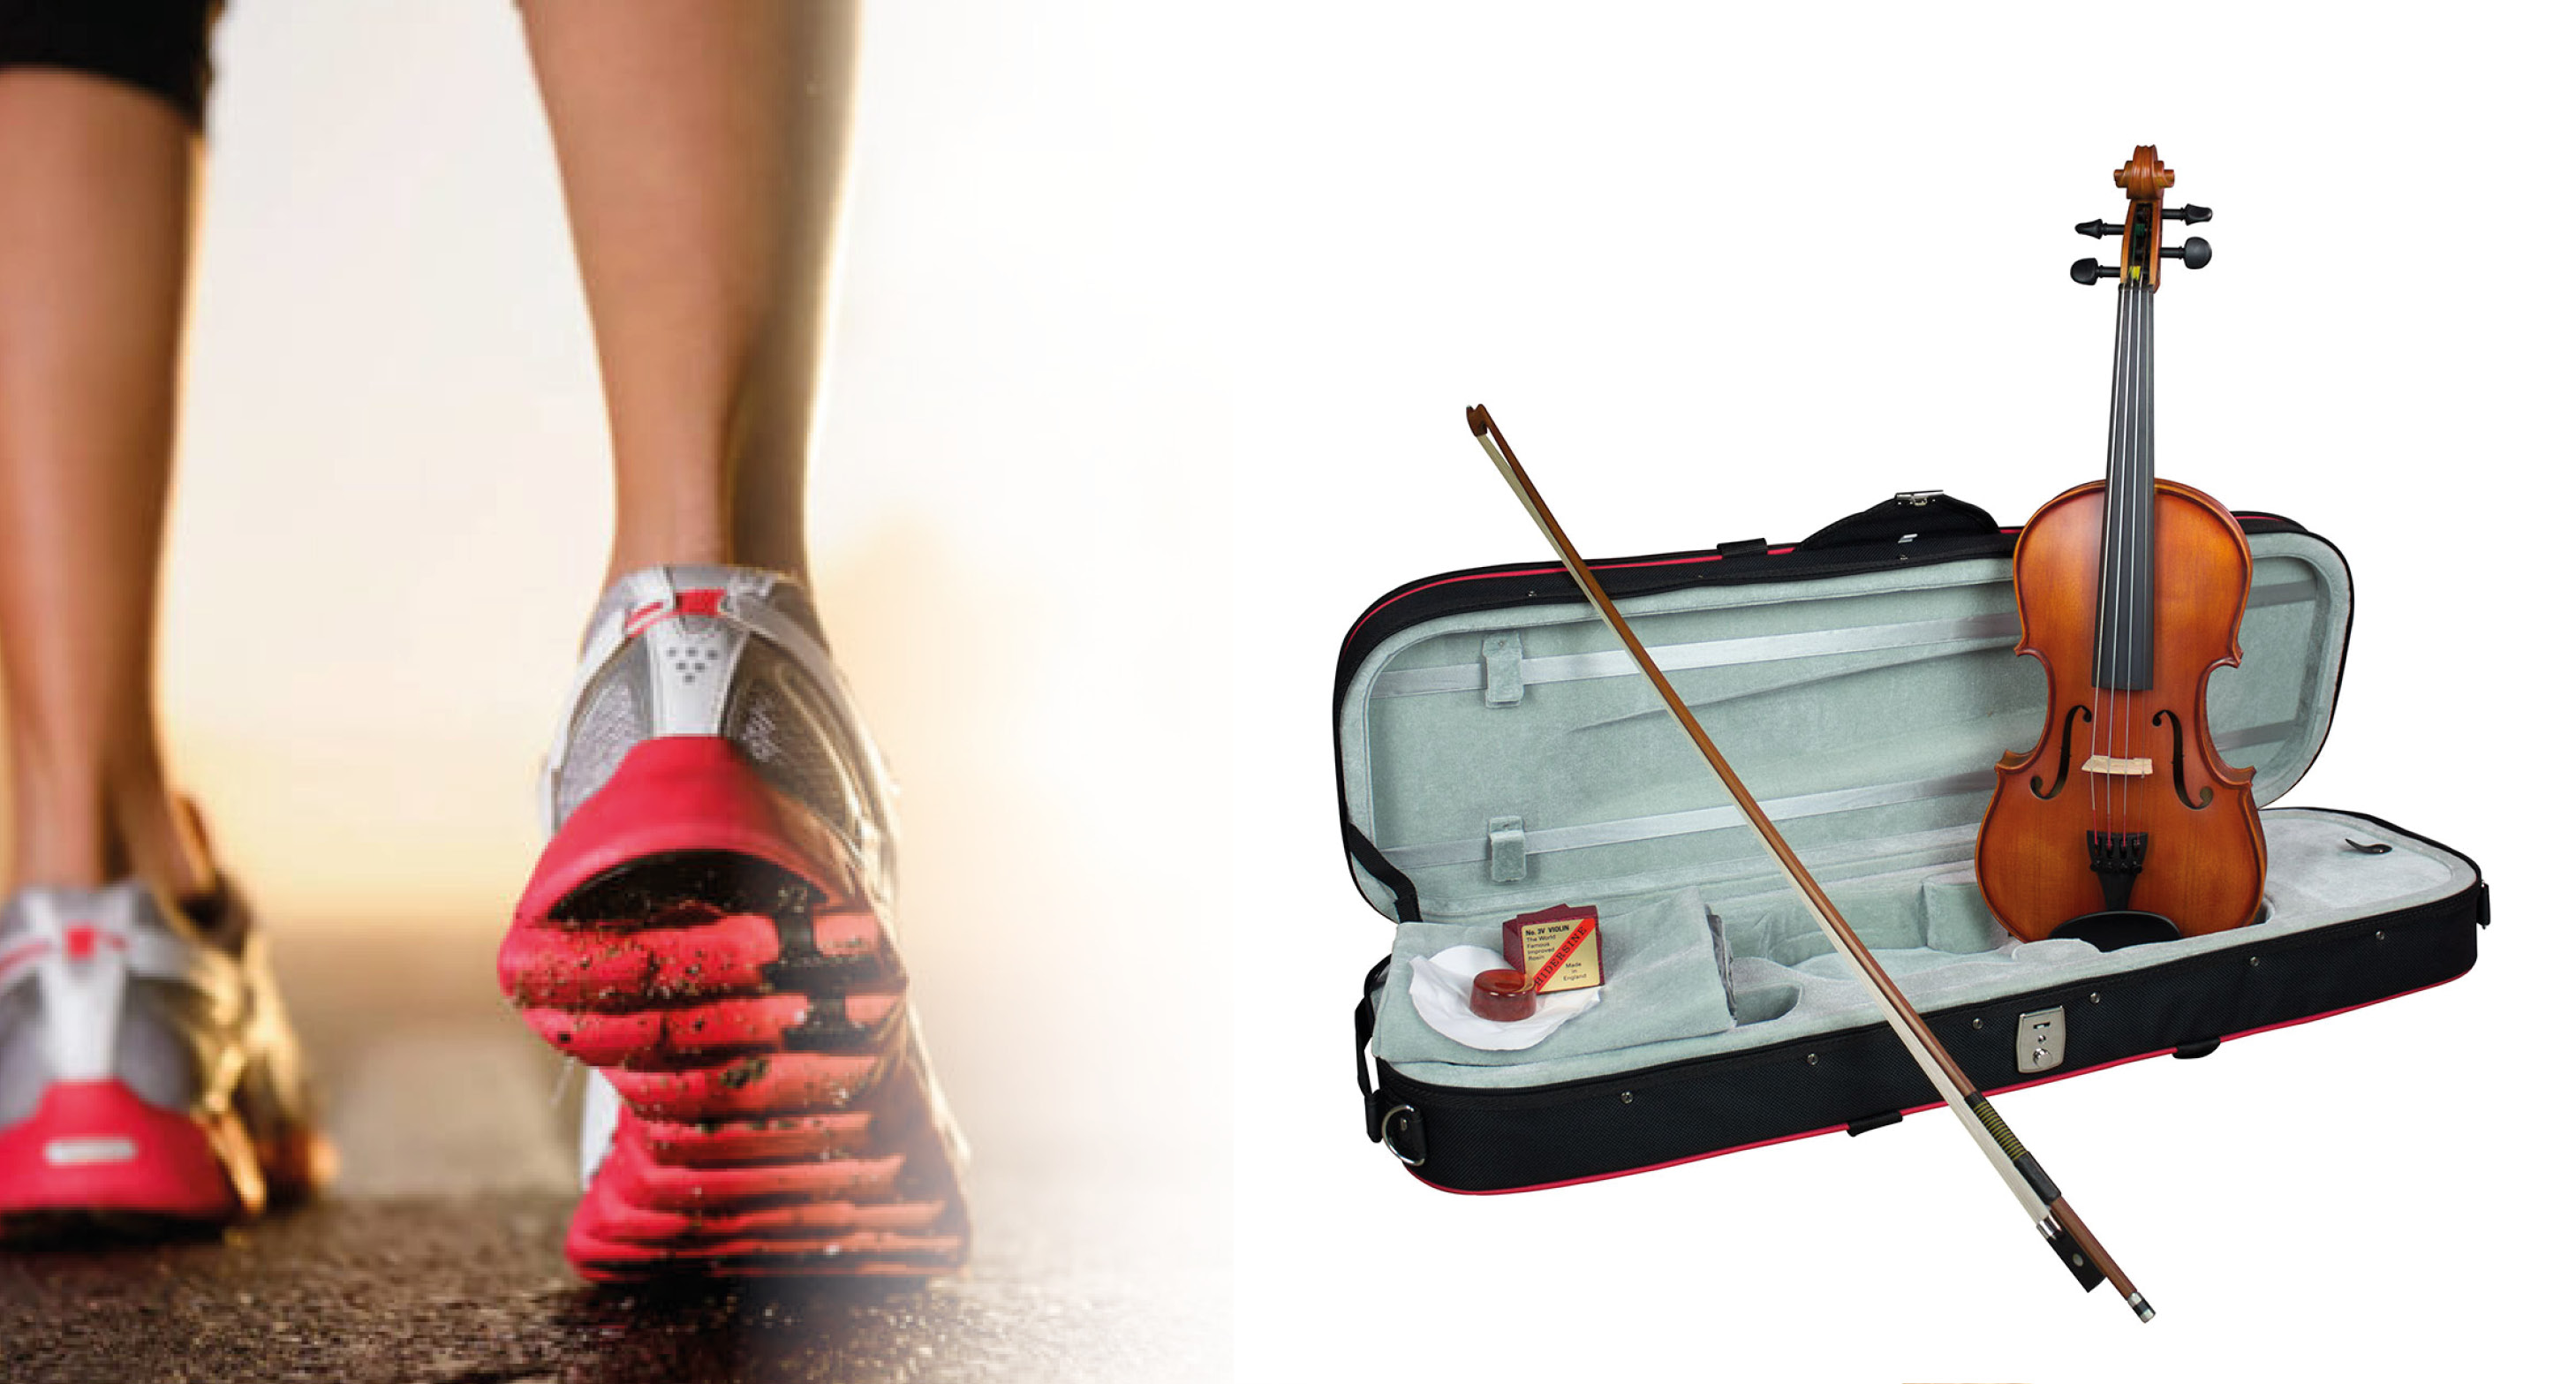 Setting off on the right foot is the key to achieving greatness.
Consider this for a moment… You’ve overindulged while on your summer holiday, as one naturally does. This is of course fine, but now it’s time to get your exercise routine back on track. You decide to take up running, and naturally, you need some new running shoes. Ask yourself this question - Will you immediately jump online and buy the cheapest pair you can find? That pair with the dodgy name and the even dodgier logo from that mysterious website you’ve never used before. Are they really the best option?
If you’re serious about becoming a lean, mean running machine then it’s crucial that your first pair of shoes fit your feet well, are of the highest quality and will last you a long time. The only way you’re going to be able to understand all these factors is by visiting a specialised running store and speaking to the experts, or by buying an established orchestral brand instrument from a specialist website that outlines all the necessary information and specification details.
What has this got to do with violins (or even cellos)?
Learning a new instrument should be a fun experience, and something that can develop into a fulfilling and rewarding life-long pursuit. Unfortunately, it is commonplace for many new players to stumble at the first hurdle as a result of making a bad decision in their choice of first instrument. Initial enthusiasm, especially among younger players, can very quickly wane if the learning experience becomes a battle due to a struggle with a poor-quality instrument.
There are many factors to consider before pulling the trigger on your first violin purchase. Let’s run through some of these.
Should I buy online or visit my local music store?
Whilst shopping online for that cute cat phone cover you saw flash up while browsing more cat videos on YouTube is fine (we all do it) - buying your first beginner violin from a website without having physically tried it out can be a bad idea. There is no substitute for speaking face-to-face with your bowed instrument specialist and trying-before-you-buy. Here’s some more information on why visiting your local music store is a good idea.
 What size instrument do I need?
Bowed instruments come in many sizes – it’s important that you understand what size you need (especially when buying for a child, as they tend to make a habit of growing). Trying to learn on an instrument that is too large or too small is very difficult. Hidersine beginner violins cater for all standard sizes. Here’s our comprehensive guide to choosing the right size violin.
So, you’ve had a look around your local store and you know what size violin you need. Now which one should you go for?
Hidersine Inizio violin outfits are the perfect starting point for enthusiastic beginners. It’s understandable that you may want to keep a lid on your initial spend while you ‘see how it goes’, yet you still want a high-quality violin from a reputable and popular brand. That’s why we created the Inizio range. With a rich history of producing orchestral instruments and accessories that dates back over 120 years, Hidersine has the experience to give you what you need.
Inizio violins are supplied as outfits containing all the essential components needed to get off to a flying start. Strings: check. Tough case: check. Rosin: check. Bow: check.
Inizio outfits of all sizes retail for around £100, however it’s always worth speaking to your local music store about their Hidersine rental schemes if this is too much of an initial outlay. You could be taking advantage of the benefits these beginner outfit offer, without the upfront cost.
FIND YOUR NEAREST HIDERSINE DEALER HERE
 Help! My violin won’t stay in tune!
This is something you may not have considered, but you’d be amazed at the amount of valuable time commonly lost to the tuning of poor-quality instruments in music lessons. We’ve calculated that over 3 hours of tuning in your lessons every academic year can be turned into playing time – find out more HERE.
Hidersine Vivente Academy are instruments made of quality solid woods that feature Wittner Finetune pegs to make tuning a whole lot easier and faster – resulting in more playing time in your lessons.
The geared pegs look exactly like conventional pegs but are specially designed to be turned in a controlled way, without the main shaft of the peg ever losing contact with the pegbox. This means you can make tiny, incremental increases or decreases in pitch - just like tuning a guitar.
Let’s face it, you aren’t going to sound like Niccolo Paganini overnight, as is the case that your new running shoes won’t see you taking part in the London Marathon next month. However, the more you think about the following points before you buy, the more likely you are to achieve something brilliant in time.
- Get hands on with different beginner instruments before you buy.
- Buy the right size instrument.
- Buy a solid-topped instrument - it will mature and sound better over time.
- Make sure your instrument is set up and that you won’t need to do this yourself. The majority of Hidersine instruments are expertly set up in the UK and are ‘ready to play’
- Consider buying a better violin than you need straight away - It will retain its value and give better results from the outset, plus it will last for longer.
Before you know it, you’ll be combining your new super amazing running shoes with your new super amazing violin to become the world’s first record-breaking orchestral Olympian. Now there’s something to aim for!
Head down to your nearest Hidersine dealer and try out some instruments today! Why not go for your new personal best time on the way?


Choosing your first beginner violin can be a difficult decision. There are lots of factors to bear in mind. What size instrument is best for me? What woods sound good? What type of bow do I need?
There is a heady mix of instruments out there, and plenty to get confused about. There is also the temptation to go for the cheapest option you can find while you ‘see how it goes’. If you’re serious about learning the violin or any other bowed instrument though, this can be a mistake.
Buying a cheap instrument invariably means that you’re buying a poor-quality instrument that is likely to sound bad, slip out of tune every time you pick it up and be uncomfortable to play. Before you know it, you may be flunking your lessons and packing it back up into its case to gather dust on top of a wardrobe forever more.
So, what should you be looking for?
Do not fear… Hidersine is here! (Sorry… we couldn’t resist). Here’s our list of the three best Hidersine beginner violins to give you some food for thought before you head out on your journey to become the next Vanessa Mae or Nigel Kennedy.
Hidersine Inizio violin outfits
 Available in all standard size variations from 4/4 to 1/8, Hidersine Inizio violins are made with strength and resilience in mind. Their laminated spruce tops and maple back and sides are perfect for the often long and arduous journeys to and from school or music lessons. The included, shaped Styrofoam case aids the instrument’s protection greatly, and can help withstand the rigours of the school bus!
Not only are they strong, they sound great and contain all the essential components needed to get you off to a flying start. Strings: check. Tough case: check. Rosin: check. Bow: check. They even come fitted with tailpiece adjusters to help early players get in tune and stay in tune more quickly. That’s more time for actual playing!
Inizio outfits of all sizes retail for around £100, however it’s always worth speaking to your local Hidersine dealer about their rental schemes if this is too much of an initial outlay. You could be taking advantage of all the benefits this beginner outfit offers, without the upfront cost.
Hidersine Vivente violin outfits
Let’s be honest, learning a new instrument isn’t the easiest thing to master at first. It’s always worth considering buying a better beginner violin than you initially need – something that will see you through your opening steps and on to your more advanced stages with ease and in style. That’s exactly what you get with Hidersine Vivente violins.
All Hidersine Vivente instruments are inspected and set-up ‘ready to play’ in our UK service workshops. This means that you can buy with confidence, take your new instrument along to your lesson and be ready to go from the off.
They feature a solid spruce top – or sound-table. This is important because your instrument’s primary voice is formed by this sound-table, and therefore the top can resonate as a single, coherent structure and sound great as a result. Their solid maple ribs and backs enhance their overall sound even further.
Your Vivente violin will improve in sound as your playing improves. As the woods age and the solid tonewood top gradually relaxes at a cellular level into its natural rest state, it will resonate even more naturally, improving its sound even further as time passes.
Hidersine Vivente Academy violin outfits
Voted ‘The UK’s Best Bowed Instrument’ by the Music Industries Association, Hidersine Vivente Academy violins are an extension of our Vivente series models, with the addition of some features that make learning an absolute breeze.
Vivente Academy violins benefit from being fitted with Wittner’s Finetune pegs to make tuning a doddle. Any teacher or student will tell you the amount of time wasted at the beginning or during lessons getting their student instrument up to pitch, and having it stay there!
The clever, German-engineering employed in Wittner’s Finetune pegs allows the internally geared peg to be turned in a controlled way, without the main shaft of the peg ever losing contact with the pegbox. This means you can make tiny, incremental increases or decreases in pitch - just like tuning a guitar. Getting your instrument in tune, and keeping it there has literally never been easier…. So now your precious time can be spent on learning and playing – not tuning, and re-tuning.
Wittner’s Finetune pegs are a genuine revelation for players of all standards, and are even fitted to virtuoso Elizabeth Pitcairn’s ‘c1720 Red Mendelssohn Stradivarius’! How’s that for a vote of confidence?
What’s more, As recommended by members of the European String Teacher’s Association, Vivente Academy violins are fitted with a centre-mounted chin rest that is generally considered to make playing even easier and more comfortable.
VIEW HIDERSINE VIVENTE ACADEMY
Quality, guaranteed.
No matter what Hidersine beginner violin you decide to buy, you can rest assured that it has been produced by a company with over 120 years of orchestral experience and expert knowledge. It will be of the highest quality, easy to play and last a long time as you progress through the exciting world of learning a new bowed instrument.